Airbyte: Creating new table syncs
In this documentation you will set up: * Database * Airbyte * Big Query
Database configuration
PostgreSQL
Add new user to pg-1-stable if one doesn't already exist for your ORG UUID.
Select ➝ Built-int authentication
Name: airbyte_ORG_UUID_FIRST_SECTION (example: airbyte_76fbd29f)
Password: generate 40 char pass
host name: allow any host (%)
How to construct a view table query: Note: Afterwards, remember to change the view table ownership to the database owner!
CREATE OR REPLACE VIEW public.report_b63788e6 AS SELECT
  public.report.index,
  public.report.report_id,
  ...
FROM public.report
WHERE org_index='2';

CREATE OR REPLACE VIEW public.user_b63788e6 AS SELECT
  public.user.index,
  public.user.user_id,
  public.user.created,
  public.user.updated
FROM public.user;

GRANT SELECT ON TABLE public.report_b63788e6 TO airbyte_b63788e6;
GRANT SELECT ON TABLE public.user_b63788e6 TO airbyte_b63788e6;
ROAD
(you should probably move road-specific view tables under road-documentation)
Create view tables to fleet_manager DB
Create view tables to fleet_manager DB:
CREATE OR REPLACE VIEW public.report_b63788e6 AS SELECT
  public.report.index,
  public.report.report_id,
  public.report.creator_index,
  public.report.vehicle_index,
  public.report.trailer_index,
  public.report.second_trailer_index,
  public.report.ticket_state,
  public.report.type,
  public.report.metadata,
  public.report.time,
  public.report.created
  FROM public.report WHERE org_index='2';

 CREATE OR REPLACE VIEW public.service_b63788e6 AS SELECT
  public.service.index,
  public.service.uuid,
  public.service.org_index
  public.service.vehicle_index,
  public.service.report_index,
  public.service.creator_index,
  public.service.assignee_index,
  public.service.name,
  public.service.code,
  public.service.cost,
  public.service.type,
  public.service.assignee_name,
  public.service.metadata,
  public.service.start_date,
  public.service.time_spent,
  public.service.created,
  public.service.updated,
  public.service.trailer_index,
  public.service.damage_uuid,
  public.service.operator,
  FROM public.service WHERE org_index='2';

CREATE OR REPLACE VIEW public.user_b63788e6 AS SELECT
  public.user.index,
  public.user.user_id,
  public.user.created,
  public.user.updated
  FROM public.user;

CREATE OR REPLACE VIEW public.vehicle_b63788e6 AS SELECT
  public.vehicle.index,
  public.vehicle.uuid,
  public.vehicle.org_index,
  public.vehicle.licence_plate,
  public.vehicle.picture,
  public.vehicle.created,
  public.vehicle.updated,
  public.vehicle.deleted_state
  FROM public.vehicle WHERE org_index='2';

CREATE OR REPLACE VIEW public.organization_b63788e6 AS SELECT
  public.organization.index,
  public.organization.uuid,
  public.organization.created,
  public.organization.updated
  FROM public.organization WHERE uuid='b63788e6-7374-4f8c-aa51-9cbe6a6fb9b9';

GRANT SELECT ON TABLE public.report_b63788e6 TO airbyte_b63788e6;
GRANT SELECT ON TABLE public.service_b63788e6 TO airbyte_b63788e6;
GRANT SELECT ON TABLE public.organization_b63788e6 TO airbyte_b63788e6;
GRANT SELECT ON TABLE public.vehicle_b63788e6 TO airbyte_b63788e6;
GRANT SELECT ON TABLE public.user_b63788e6 TO airbyte_b63788e6;
Give correct database permissions to database service account user
After creating the view tables needed, you will need to give the database user service account airbyte_xyz123... the proper permissions so it can connect from Airbyte.
I recommend using pgadmin, unless you are good at using the CLI tool psql to give these permissions.
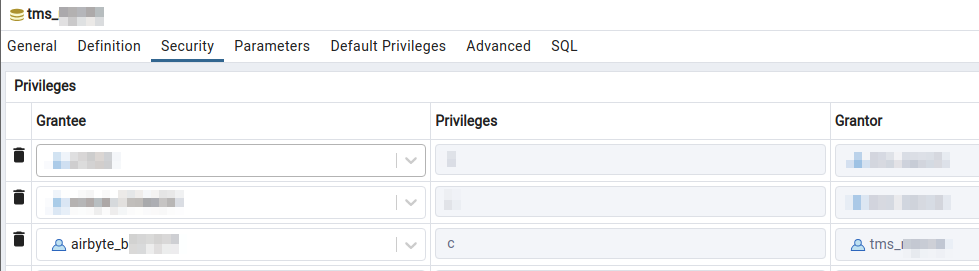
1. Give connect (c) permissions to the database for the airbyte_xyz123... user
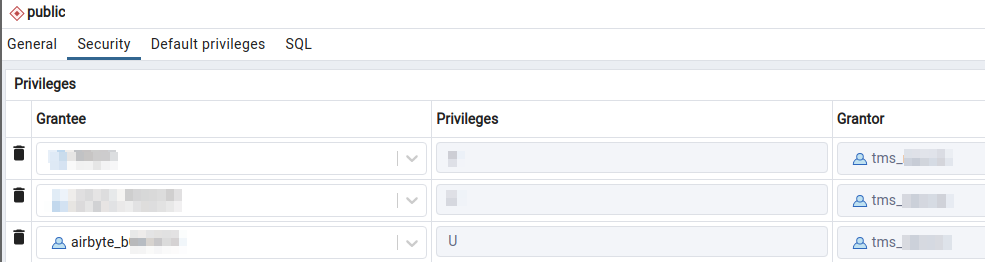
- Give usage (U) permissions to the public schema for the
airbyte_xyz123...user
- Give read (r) permissions to all of the view tables you created in the previous step for the
airbyte_xyz123...user
BigQuery
Enable BigQuery API
Go to BigQuery and select your project in the list and create new dataset from three dots
Dataset ID = attracs_CustomerName_stable_tms_reports_CustomerName Location type = Region ➝ europe-north1 (Finland) Leave everything else as default.
Airbyte
Currently https://airbyte-nightly.attracs.com/ is the one in use for both production and nightly. In future https://airbyte.attracs.com/ for stable and https://airbyte-nightly.attracs.com/ for nightly should be used.
You will need to add a new connection between Postgres and Big Query. First, login to https://airbyte-nightly.attracs.com
1. Set up a new source
- Click on sources, then click on the "+ New source" to add a new source:
 1. Source type:
 Postgres
2. Name: ORGNAME - attracs-postge - DB_NAME
3. Host: PUBLIC_IP_ADDRESS_HERE
1. 34.88.30.27 for Stable
4. Port: 5432
5. DB Name: DB_NAME
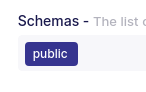
6. Schemas: public
1. Should look something like this:
 7. User:
 DB_USERNAME
1. Usually airbyte_START_OF_ORG_UUID
8. Password: Can be found from 1Password
9. Connect using SSL: Enabled
1. Should look something like this:
 10. After this, you should be done with the source, just click on 'Set up source'
1. Airbyte will start checking that the connection works:
10. After this, you should be done with the source, just click on 'Set up source'
1. Airbyte will start checking that the connection works:
 2. If everything is good, you will get this message in the same place as the loading bar:
 3. If you are getting the error
 non-json response , double check the information you gave to the source and make sure your permissions are correct on the database. Your airbyte_xyz123 service account should have connect permissions to the database, read permissions to the public schema and usage permissions to all of the view tables.
Here's a refresher link in case you missed it:
2. Set up a new destination
- Destination type:
BigQuery - Name:
BQ - <GCP_PROJECT_ID>.<DB_NAME>_<ORG_NAME>- Example: BQ - attracs-soite-stable-038527.tms_booking_soite
- Default Dataset ID:
<GCP_PROJECT_ID>_<DB_NAME>_<ORG_NAME>- Example: attracs_soite_stable_tms_booking_soite
- Project ID:
GCP_RPOJECT_ID - Service Account Key JSON:
INSERT_JSON_HERE- Can be found from 1Password
- Dataset Location:
europe-north1
3. Set up a new connection
By combining the source and destination, we can create a "connection" in Airbyte.
1. Choose the source you created previously
2. Choose the destination you created previously
3. You now arrive in the connection page. If you do not see any tables here, you should re-create your source.
4. Destination namespace: Destination default
5. Normalization & Transformation: Normalize tabular data
6. Now, just click on "Set up connection" to finalize your settings. You will get a page showing "Sync History". You can click on the running sync to open it up and see what is happening under the hood.
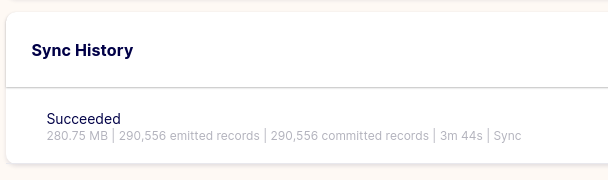 1. After the sync completes, it will show up under "Sync History" with this message: