SSL certificate renewals: *.online.aholadigital.com
⚠️ Legacy (DigiCert-era). SSL certificate renewal has moved to one current, unified process — Let's Encrypt automation + Ahola Group Vault (https://vault.aholagroup.com/), ~90-day certs. See: SSL certificate renewals: Current process (2026). This page is kept for reference only.
Creating windows compatible certificate
Get online.aholadigital.com certificate from DigiCert. This is currently managed by us.
This is Windows RDS environment so certificate needs to be .PFX format. If the certificate you have is on format DigiCertCA.crt and star_attracs_com.crt you need to first combine these two in to one .crt
cat DigiCertCA.crt star_online_aholadigital_com.crt > star-online-aholadigital-com-2024.pem
After doing this you can use the star-online-aholadigital-com-2024.pem with online_aholadigital_com.key (This online_aholadigital_com.key is in 1password for now).
To create .pxf format certificate:
openssl pkcs12 -export -out star-online-aholadigital-com-2025.pfx -inkey online_aholadigital_com.key -in star_online_aholadigital_com_2025/star-online-aholadigital-com-2025.pem
- You can put password to certificate, if you do, remember to store it in 1password!
Check that created certificate worked, run command:
openssl pkcs12 -info -in star-online-aholadigital-com-2025.pfx
convert base64 to pfx
base64 -d cert_base64.txt > certificate.crt
check altnme:
openssl pkcs12 -in star-online-aholadigital-com-2026-04.pfx -nokeys -clcerts -passin pass: | openssl x509 -noout -subject -ext subjectAltName
Installing new certificate
- Upload certificate to RDS broker (10.170.0.64) and RDS gateway's (10.170.0.59) & (10.170.0.60).
- We have uploaded and stored Certificates in Jump
C:\certholderto holding the cert for importing. - Import certificate to
rdsgw-01&rdsgw-02:- open IIS ➝ Server Certificates
- open it ➝ on the right panel import...
- import your uploaded new certificate.
- After importing new certificate
- Add new cert to the default web site.
- Right click Default Web Site in IIS and select edit Bindings.
- In Bindings: Click https/443 and click edit.
- Select new certificate and check validity on the view button.
Server Manager in the RDSBroker:
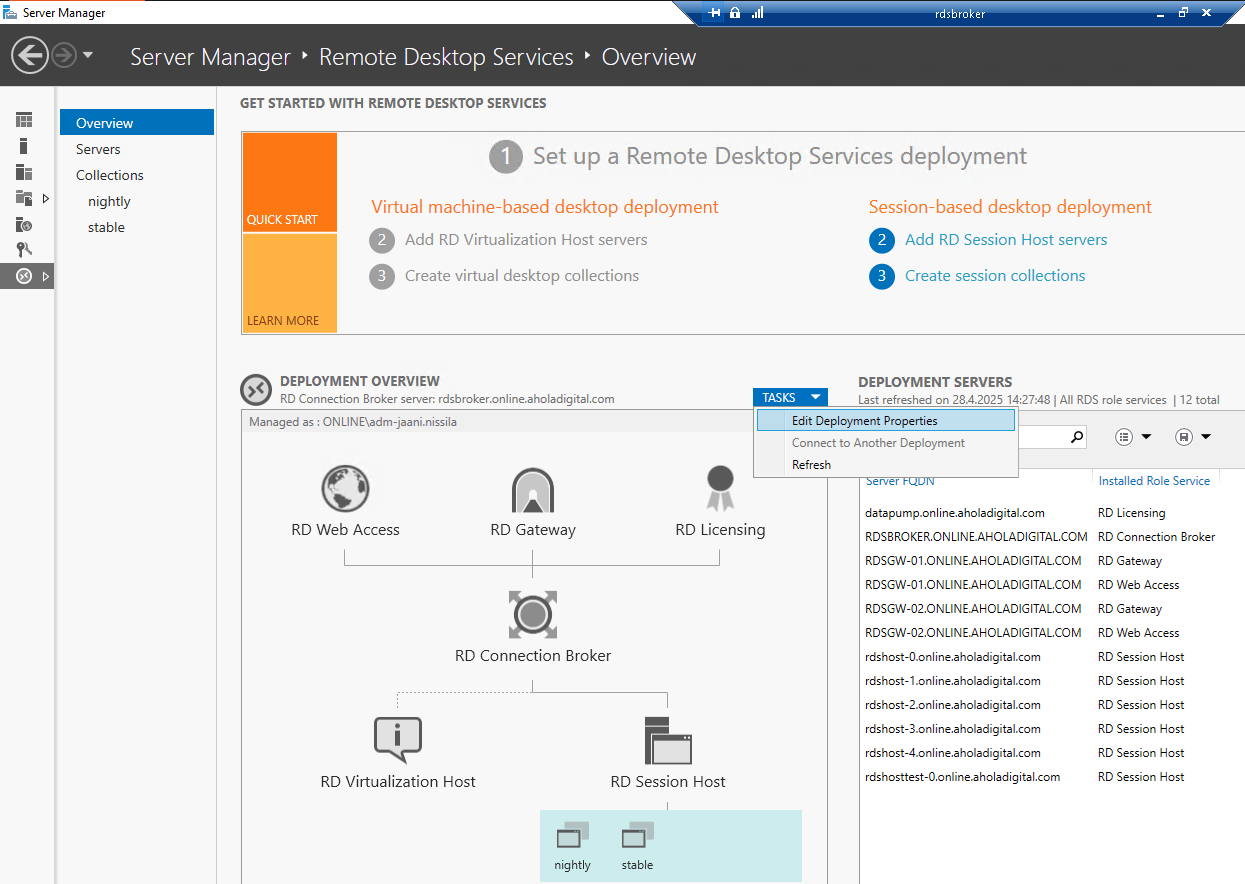
* On the Connection Broker, open the Server Manager.
* Click Remote Desktop Services in the left navigation panel.
* Click Tasks > Edit Deployment Properties.
*  *
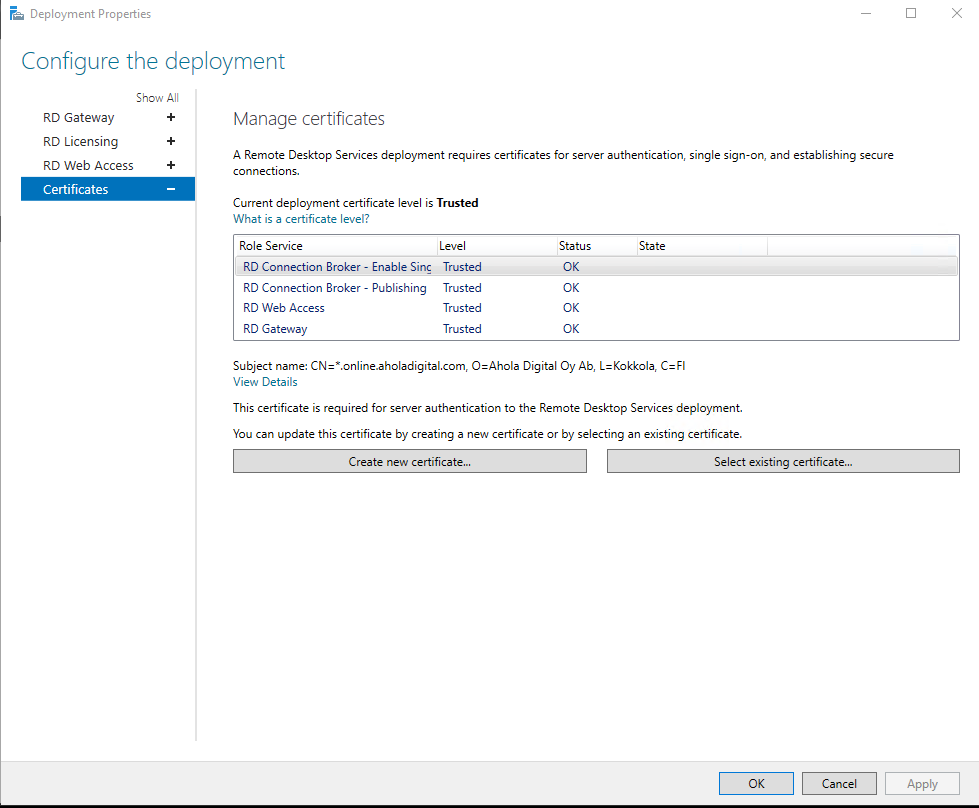
* Select Certificates tab
*  *
* Select existing certificate
* 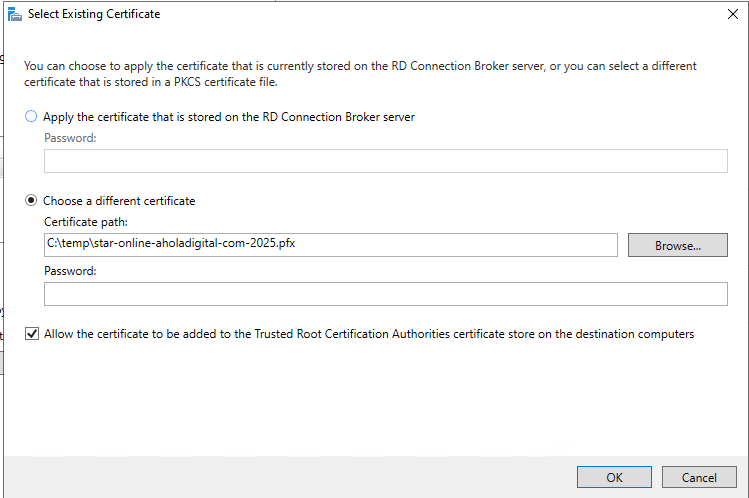 *
* Browse and select new certificate
* Select Allow 'Box'
* Import new certificate for each service.
* Apply will take the new certificate in use.
* Check View Details to confirm the certificate.
Key:
[
https://github.com/Attracs/attracs-linux-playbooks/tree/master/frontend/files/cert
](https://github.com/Attracs/attracs-linux-playbooks/tree/master/frontend/files/cert)
Selecting which certificate to use Now that you have created your certificates and understand their contents, you need to configure Remote Desktop to use those certificates.
On the Connection Broker, open the Server Manager. Click Remote Desktop Services in the left navigation pane. Click Tasks > Edit Deployment Properties.In the Configure the deployment window, click Certificates. Click Select existing certificates, and then browse to the location where you saved the certificate you created previously. Look for the file with the .pfx extension. Import the certificate. You can use a single certificate for all the roles if your clients are internal to the domain only, by generating a wildcard certificate (*.CONTOSO.local) and binding it to all roles. Note that, even if you have multiple servers in the deployment, Server Manager will import the certificate to all servers, place the certificate in the trusted root for each server, and then bind the certificate to the respective roles.