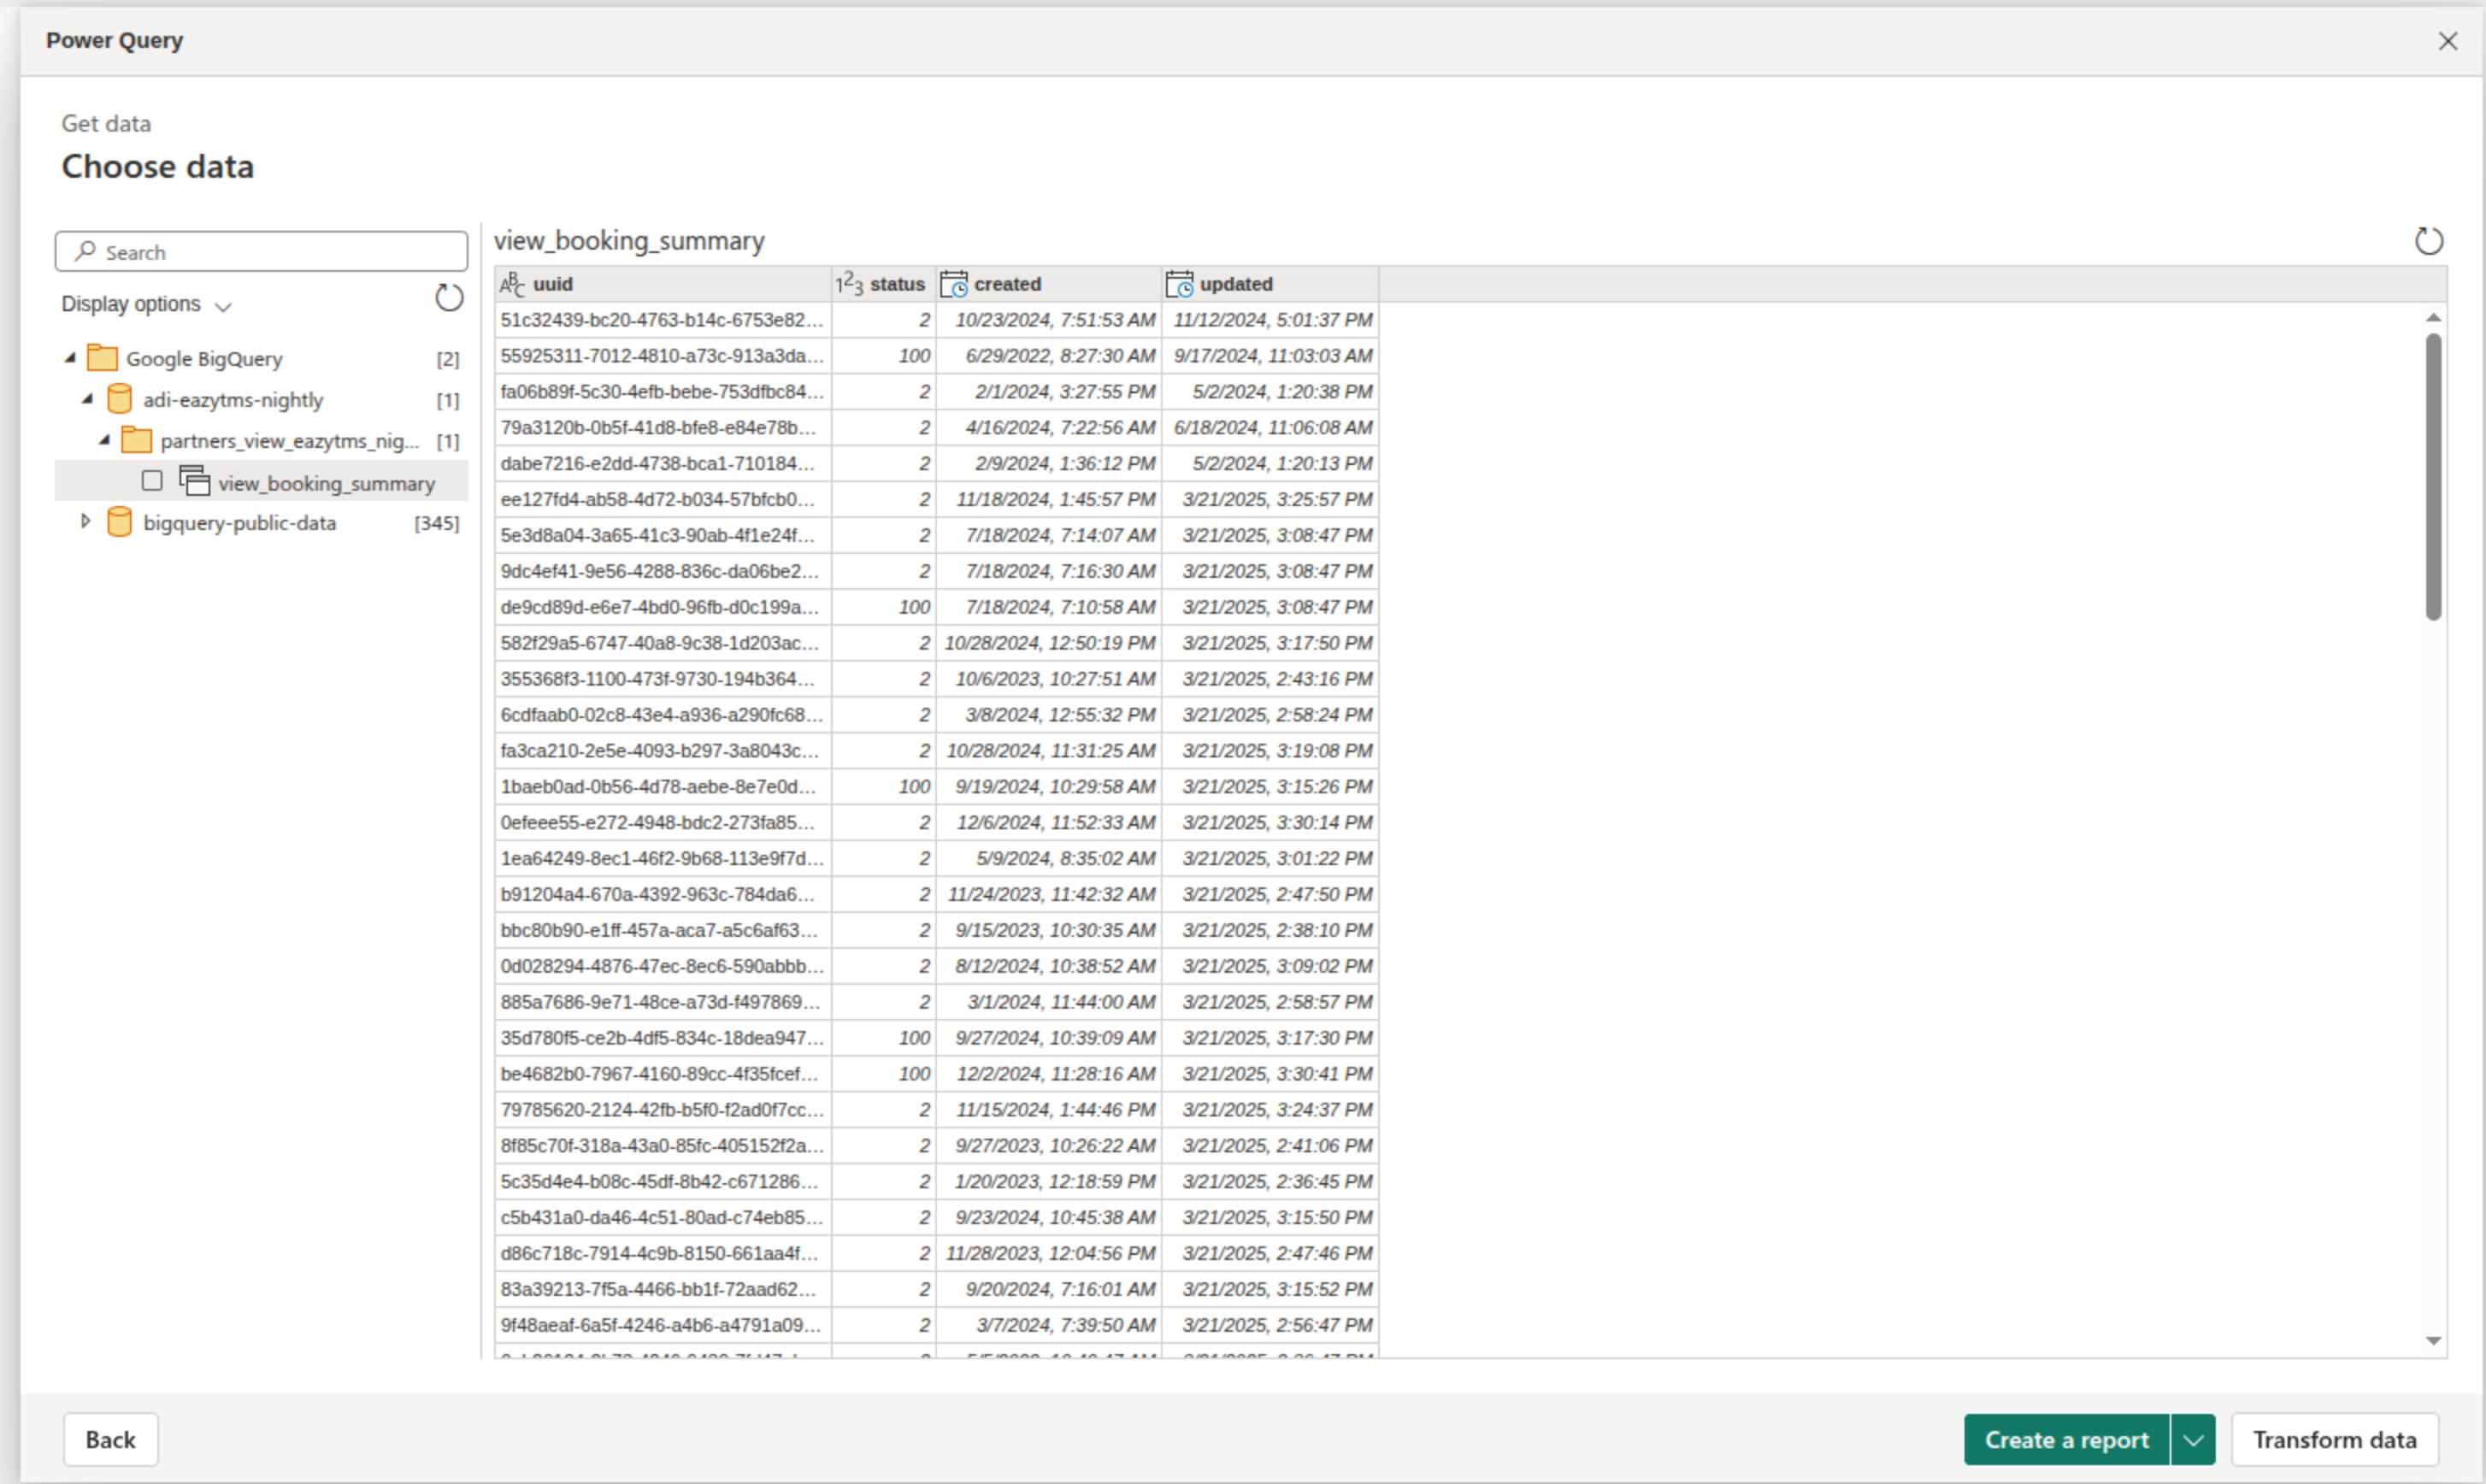
Datastream -> Bigquery -> Power Bi
Database
- Database setup
- The following queries need to be setup to be able to create the datastream user and the password.
- There are some extra queries that are needed for the datastream configuration.
DO $$
BEGIN
  IF NOT EXISTS (SELECT FROM pg_catalog.pg_roles WHERE rolname = 'datastream_user_partner_portal') THEN
    CREATE USER datastream_user_partner_portal WITH ENCRYPTED PASSWORD 'super_ultra_secured_password';
  END IF;
END
$$;

-- 2. Grant Permissions
ALTER USER datastream_user_name WITH REPLICATION;
GRANT USAGE ON SCHEMA public TO datastream_user_name;
GRANT SELECT ON ALL TABLES IN SCHEMA public TO datastream_user_name;
ALTER DEFAULT PRIVILEGES IN SCHEMA public GRANT SELECT ON TABLES TO datastream_user_name;

-- 3. Create Publication (Drop first to avoid conflicts if re-running)
DROP PUBLICATION IF EXISTS datastream_publication;
CREATE PUBLICATION datastream_publication FOR ALL TABLES;
-- OR if you want to sync specific tables, remember either or NOT both.
CREATE PUBLICATION datastream_publication FOR TABLE Table_1, Table_2, Table_3, Table_4;

-- 4. The Critical Fix: specific permission to enter this DB
GRANT CONNECT ON DATABASE "data-base-name" TO datastream_user_name;

-- 5. Re-apply these (Permissions are local to the DB, so we must run them HERE)
GRANT USAGE ON SCHEMA public TO datastream_user_name;
GRANT SELECT ON ALL TABLES IN SCHEMA public TO datastream_user_name;
ALTER DEFAULT PRIVILEGES IN SCHEMA public GRANT SELECT ON TABLES TO datastream_user_name;

*/
-- Grant the REPLICATION privilege to your current admin user
ALTER USER postgres WITH REPLICATION;
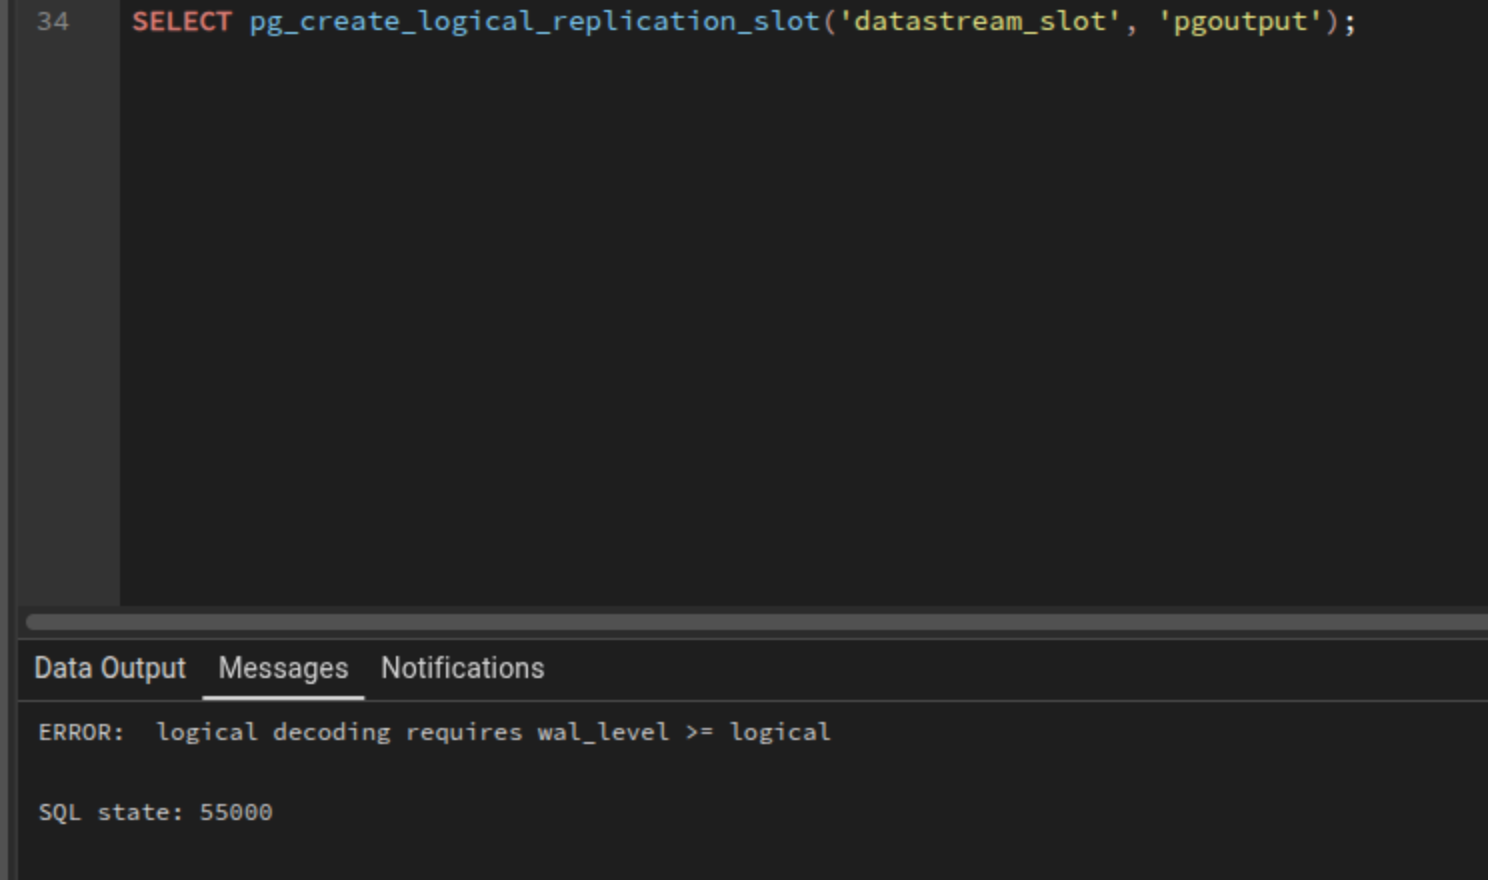
SELECT pg_create_logical_replication_slot('datastream_slot', 'pgoutput');
Possible error
If you get the following error (image below), it is due to that the database is not yet configured for replication, therefore logical decoding must be manually enabled.
 To enable logical decoding follow these steps:
* * * Go to your Google Cloud Console and navigate to Cloud SQL.
* Click on your Production Instance (the one hosting the db).
* Click Edit in the top toolbar.
* Scroll down to the Flags section.
* Click Add Flag.
* Search for and select:
To enable logical decoding follow these steps:
* * * Go to your Google Cloud Console and navigate to Cloud SQL.
* Click on your Production Instance (the one hosting the db).
* Click Edit in the top toolbar.
* Scroll down to the Flags section.
* Click Add Flag.
* Search for and select: cloudsql.logical_decoding
* Set the value to: on
* Click Save.
⚠️ Important: Clicking Save will restart the nightly/production database. Make sure it is safe to do so (i.e., no one is actively using the application). Once this is done re-connect to the db and run the query again. It should pass now. Now you can continue with the rest of the application.
Datastream
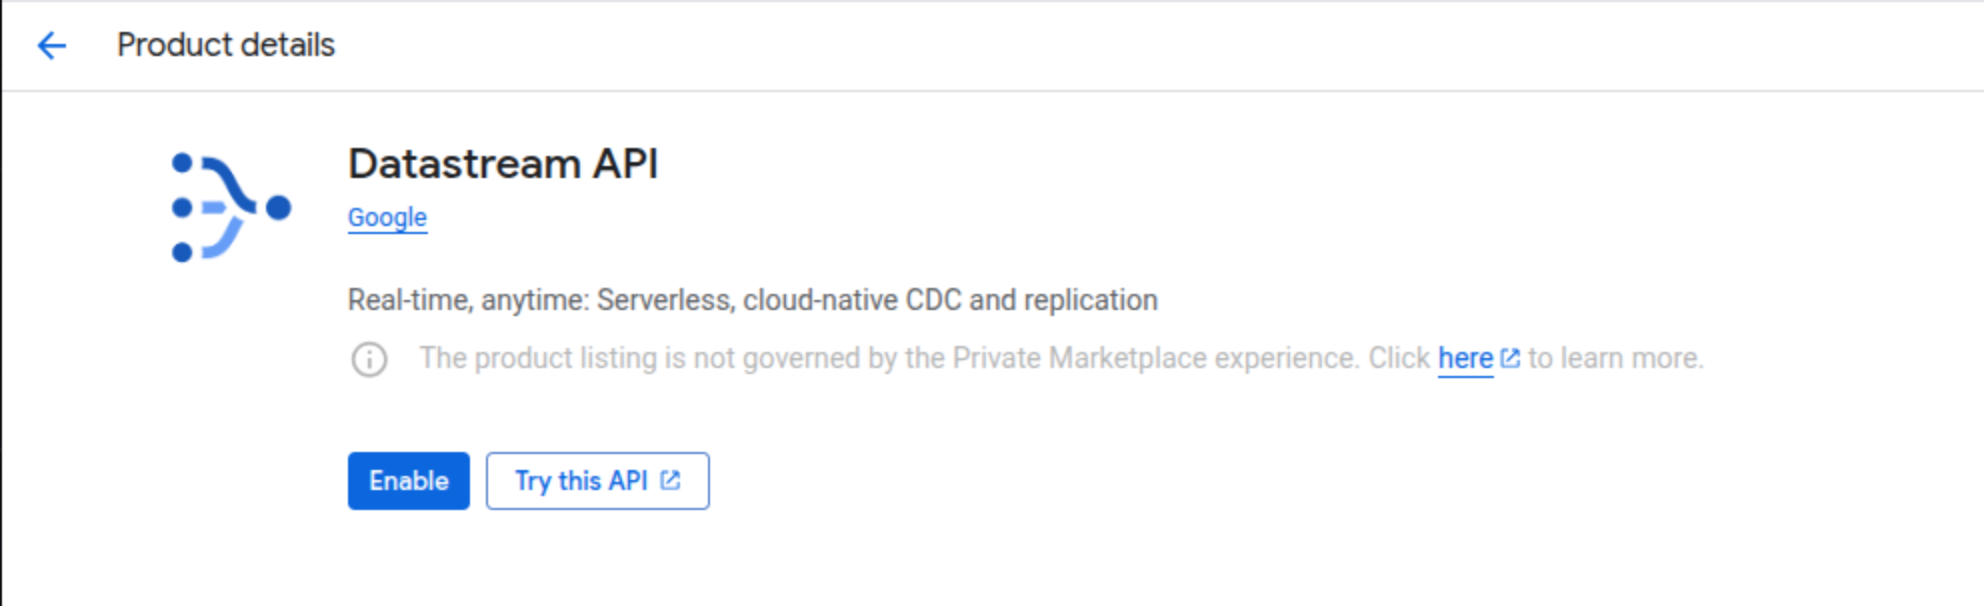
2. Datastream api needs to be enabled. In the console, look for Datastream API and enable it. This process takes a few seconds.
3. Once the api is enabled, click in the button Create stream.
4. In the Getting started Section I recommend to use names related to the database it's being dealt with to avoid confusion. In this case our db is partner_portal_nightly. Our source is PostgresSQL and we want to send the data to BigQuery.
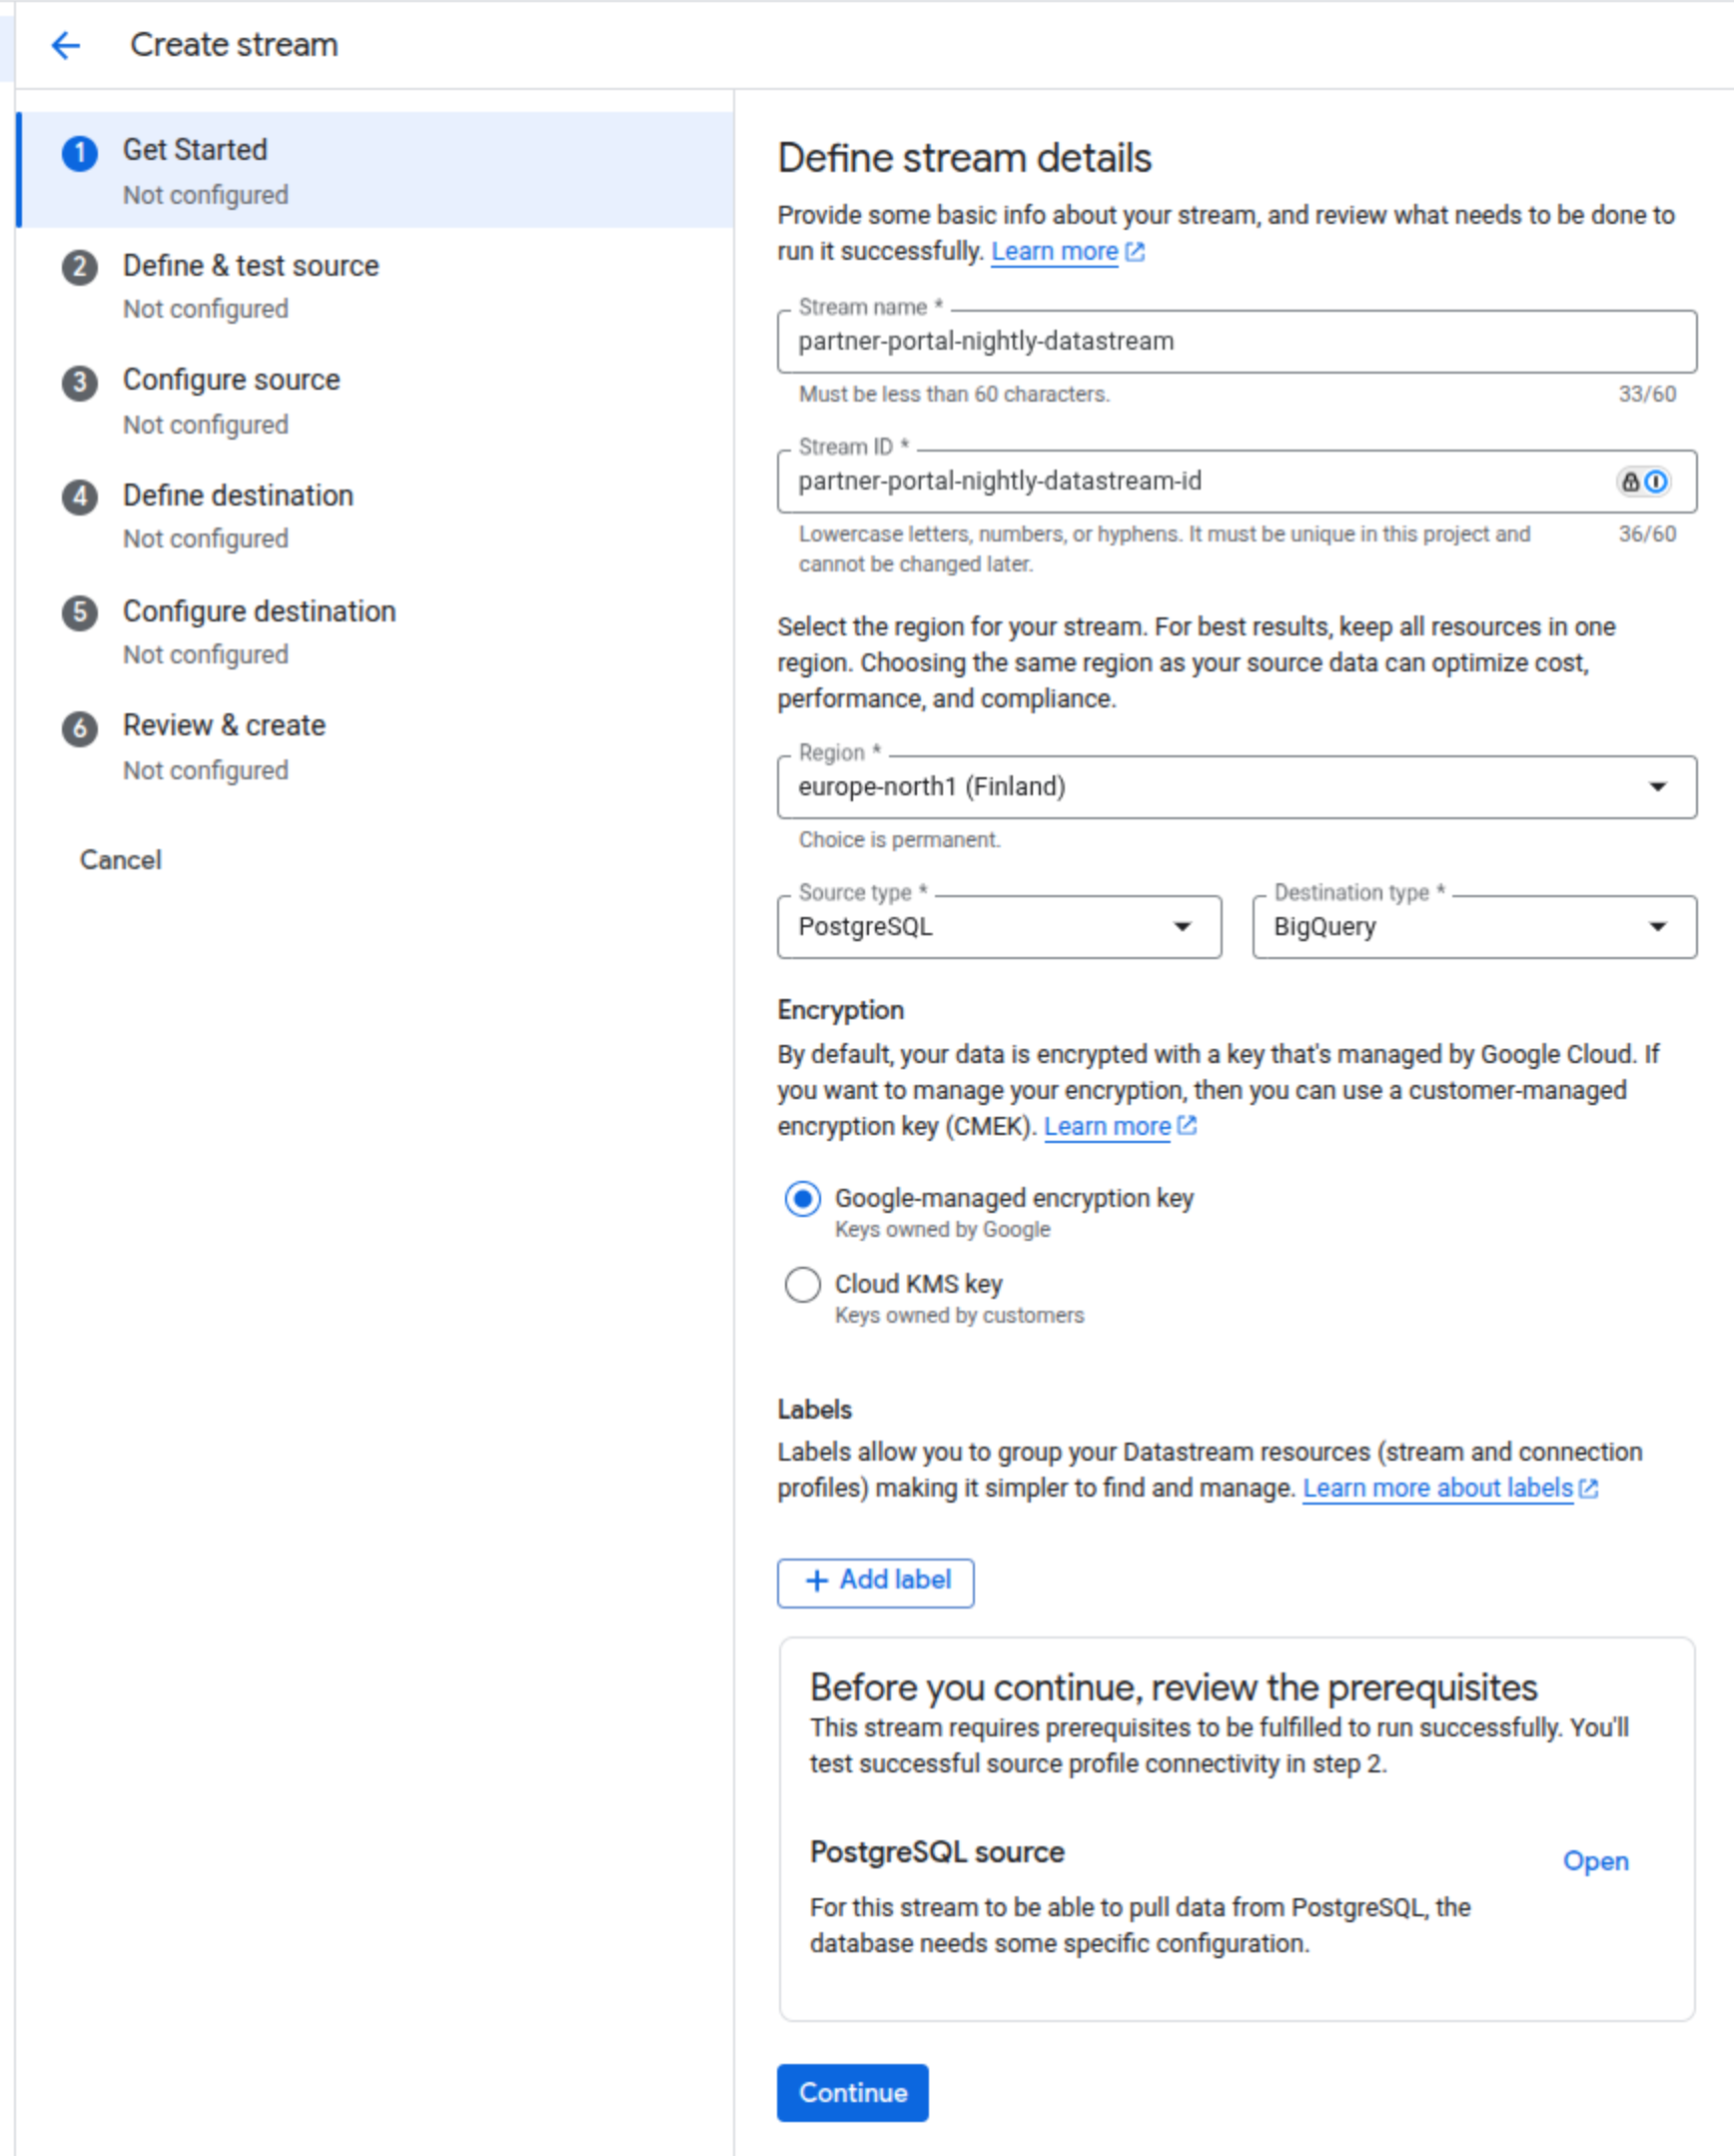
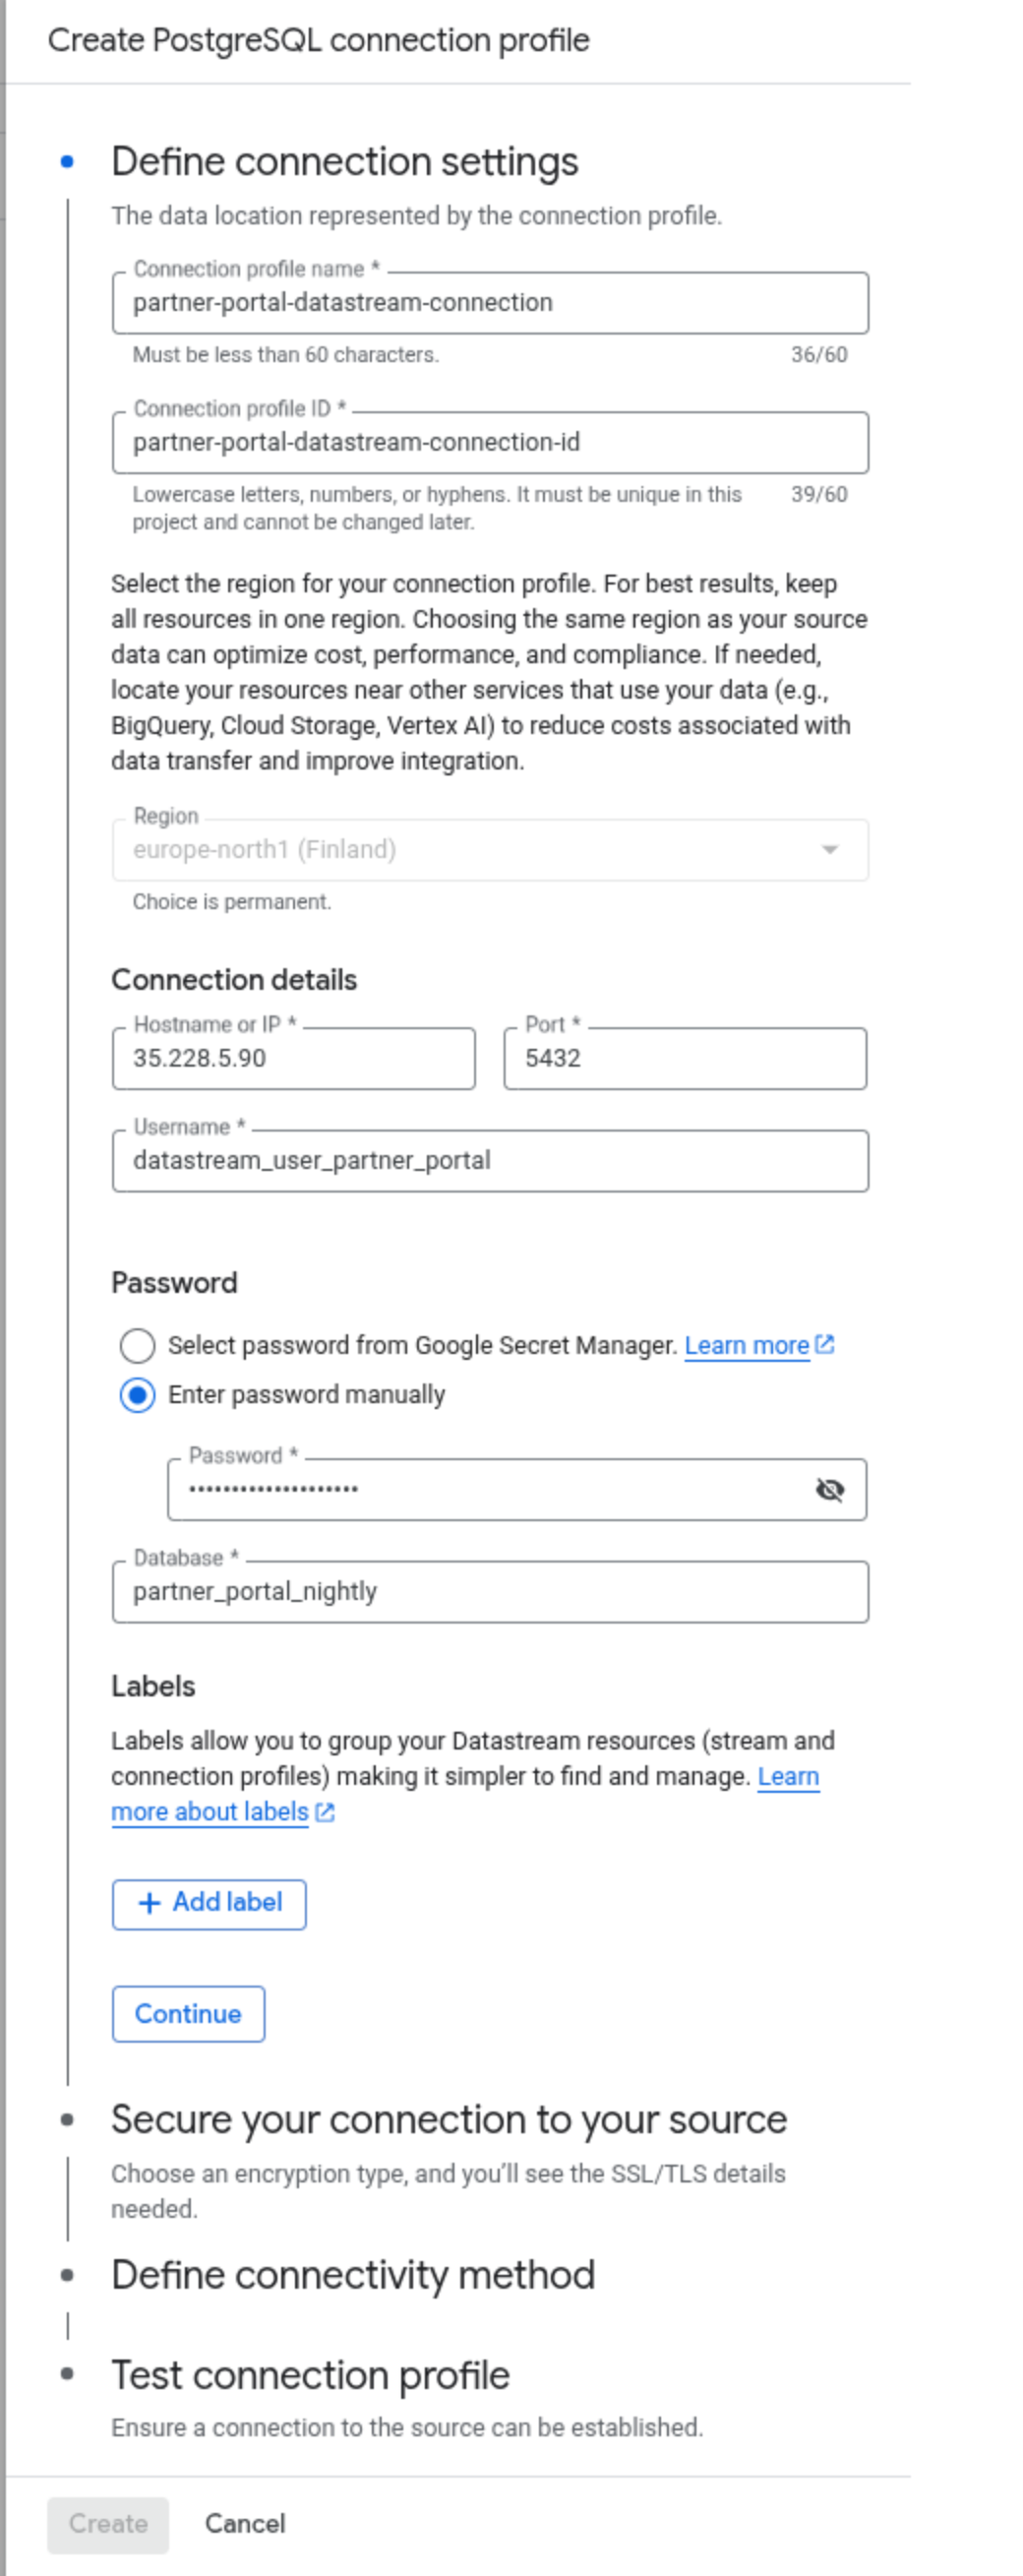
5. During the Define & test source configuration, the connection details can be obtained from the instance itself. Hostname or IP is the instance's Public IP. Username, password were created in step 1, so make sure you save this information. The Database is the name of the database which the connection is setup for.
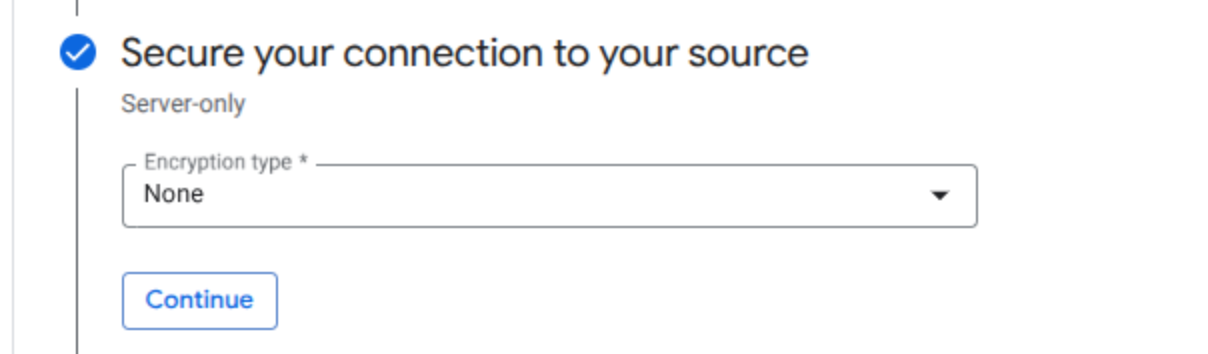
6. During the Secure your connection to your source step, the encryption type will be None.
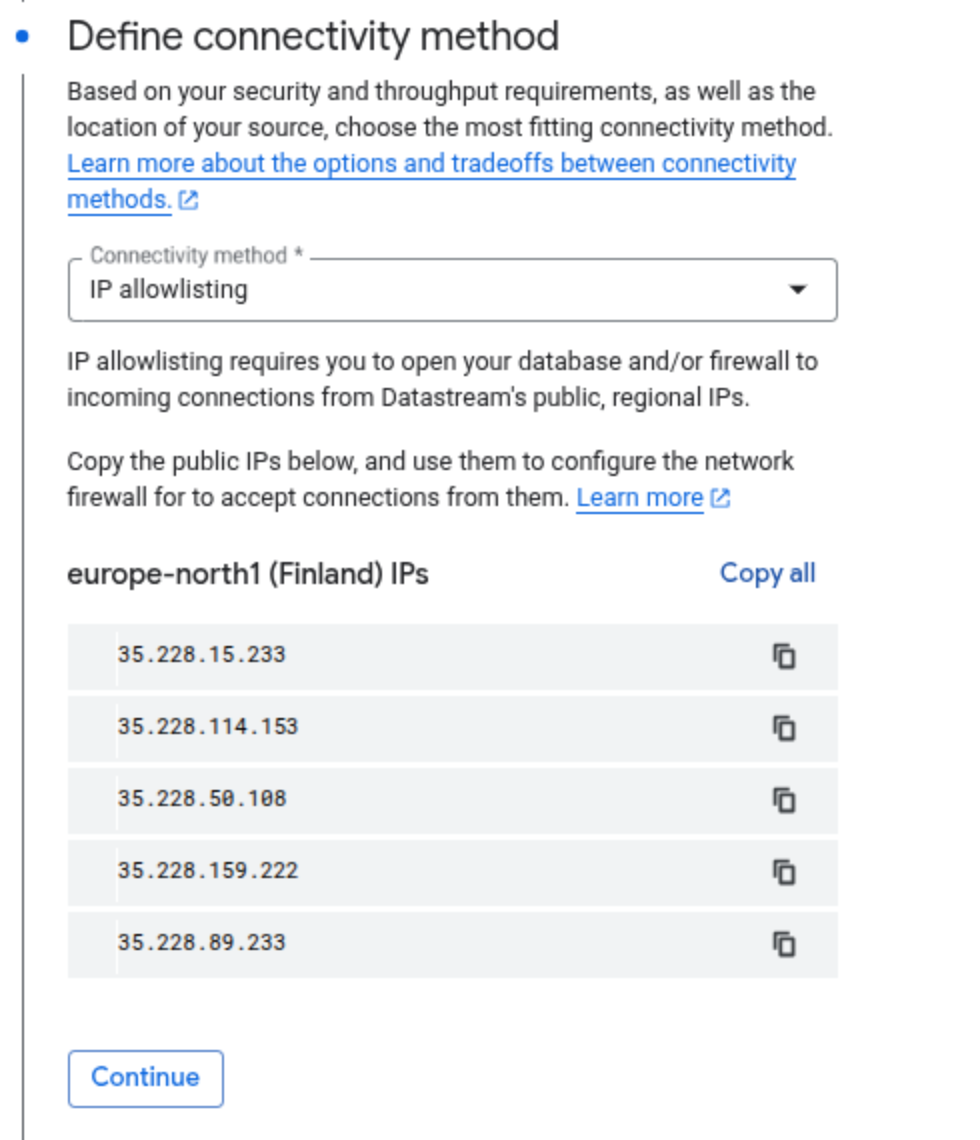
 7. In the Define connectivity method, since we are connecting using the instance's Public IP, in the Connectivity method we need to select IP allowlisting. Now, we need to add these list of IP's to our instance. To do this, we need to go back to Cloud SQL →Connections →Networking (Tab) → scroll to Authorized networks →Add a network. Keep in mind you cannot add them all at once so they need to be added one at the time. The following name-nomenclature will be used:
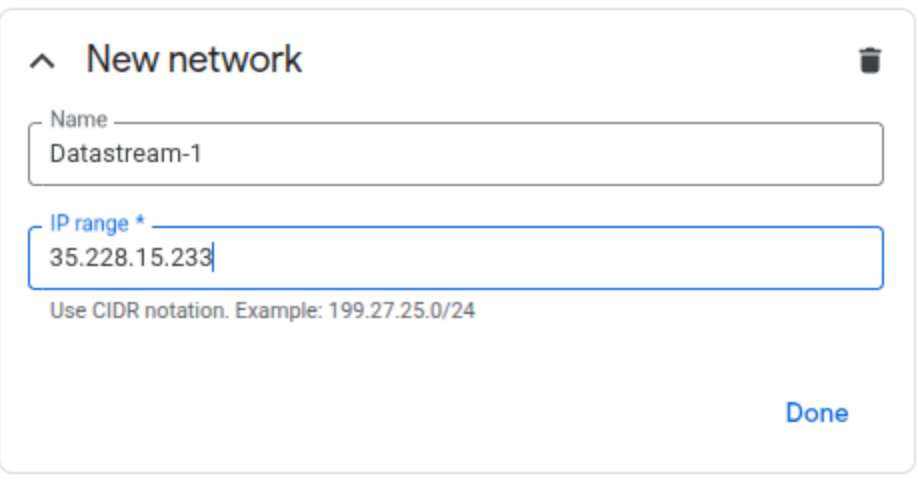
Once all networks have been added, click save (this might take a few seconds) and go back to the Define connectivity method and click Continue.
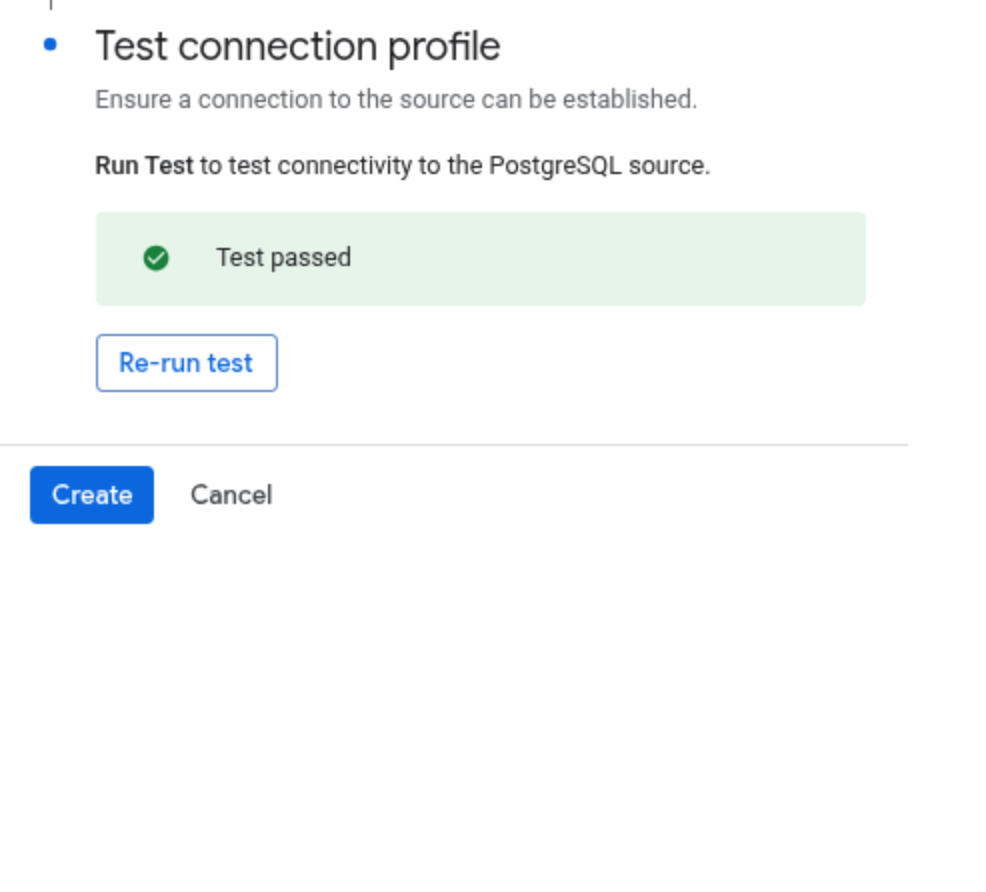
8. Run the test and if everything is setup correctly it should pass. Once the test has passed, click on Create.
9. In the Configure source section, make sure the Replication slot name and the Publication name match the names that were run with the queries in step 1.
For the Select object to include select Specific schemas and tables and select public. If you are dealing with a db that contains more schemas, this choice might change. Select according to your needs.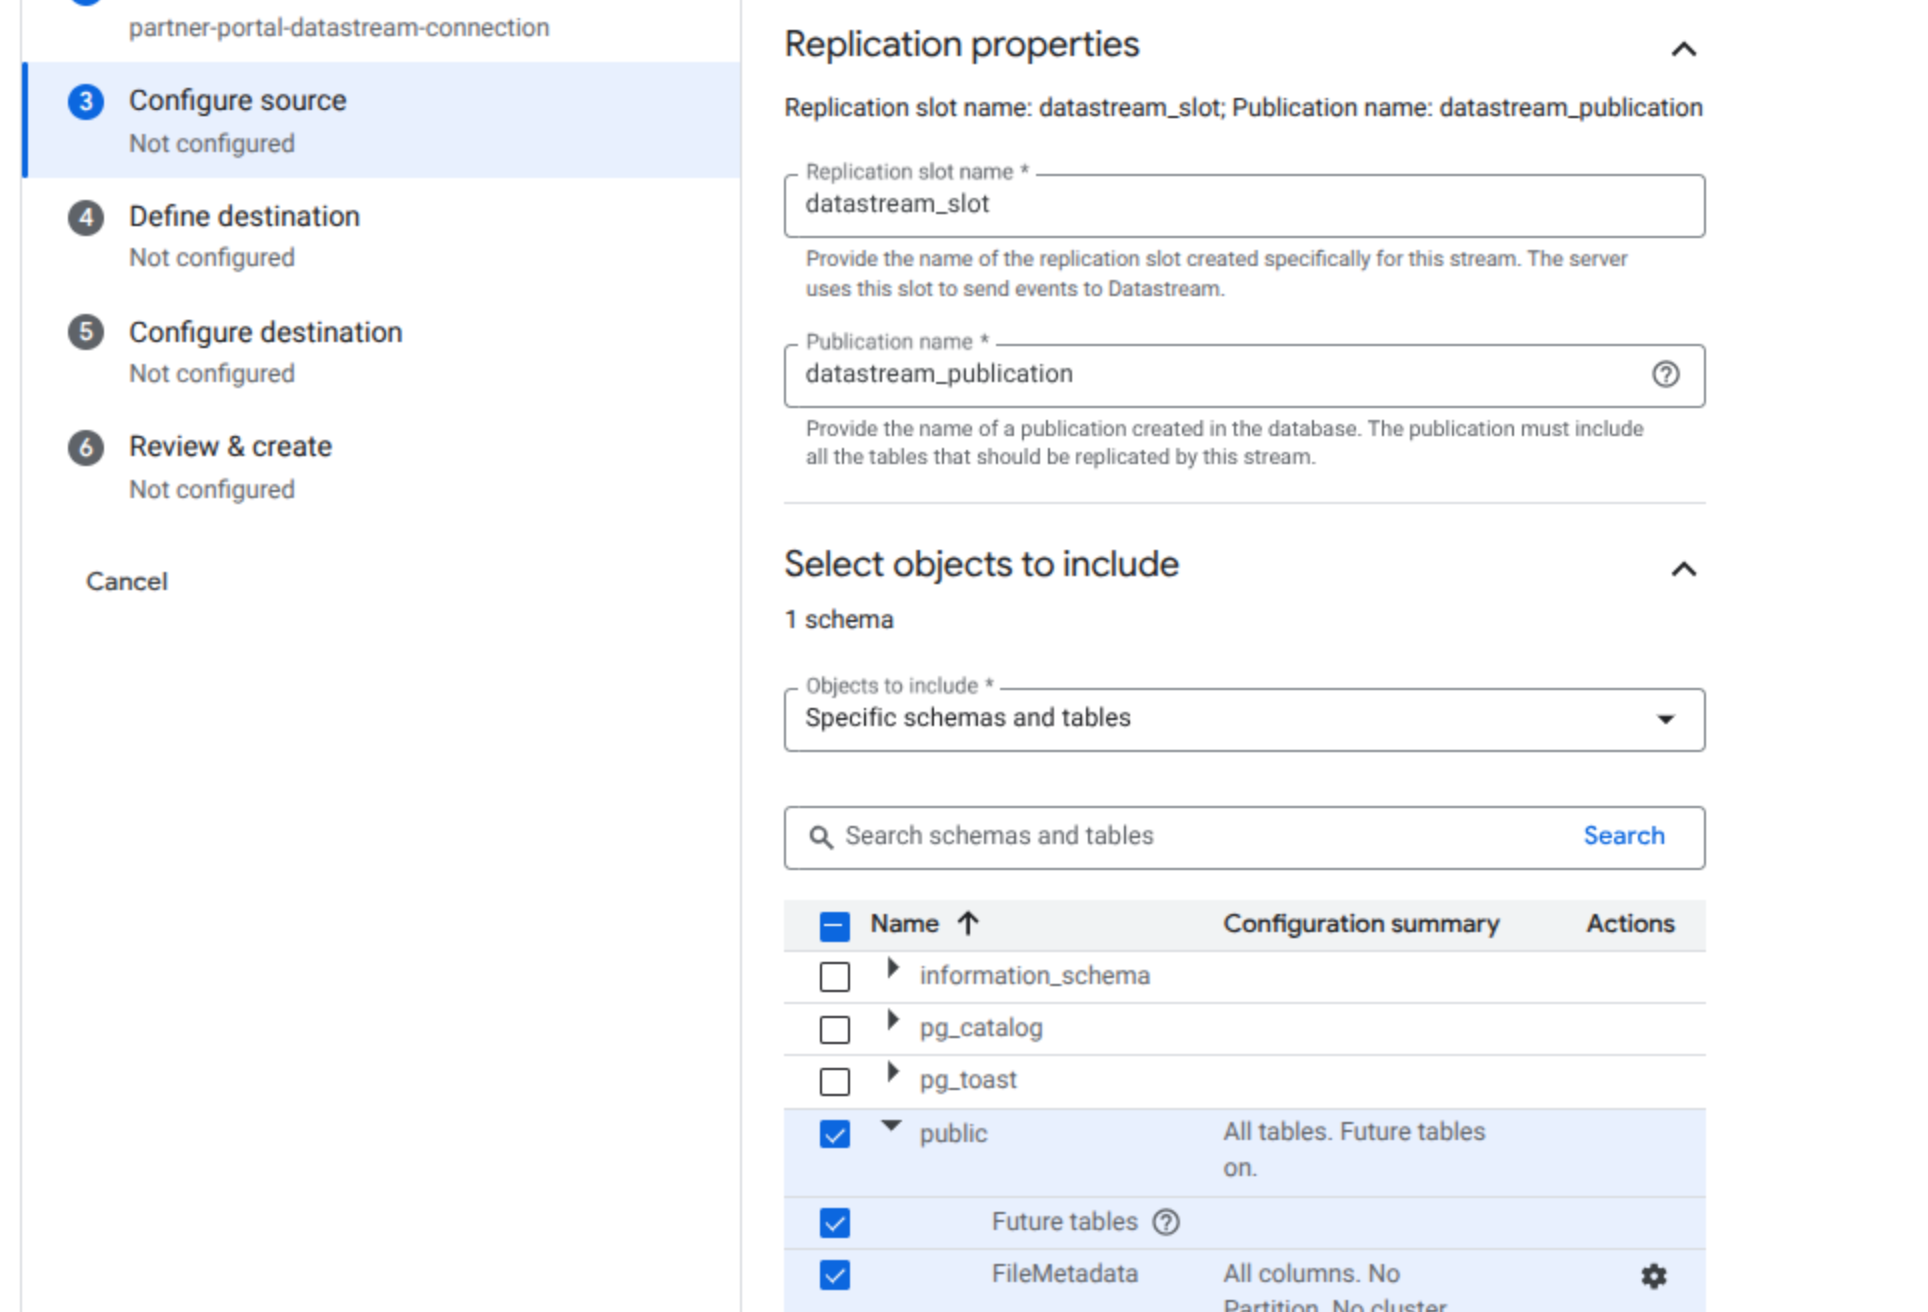
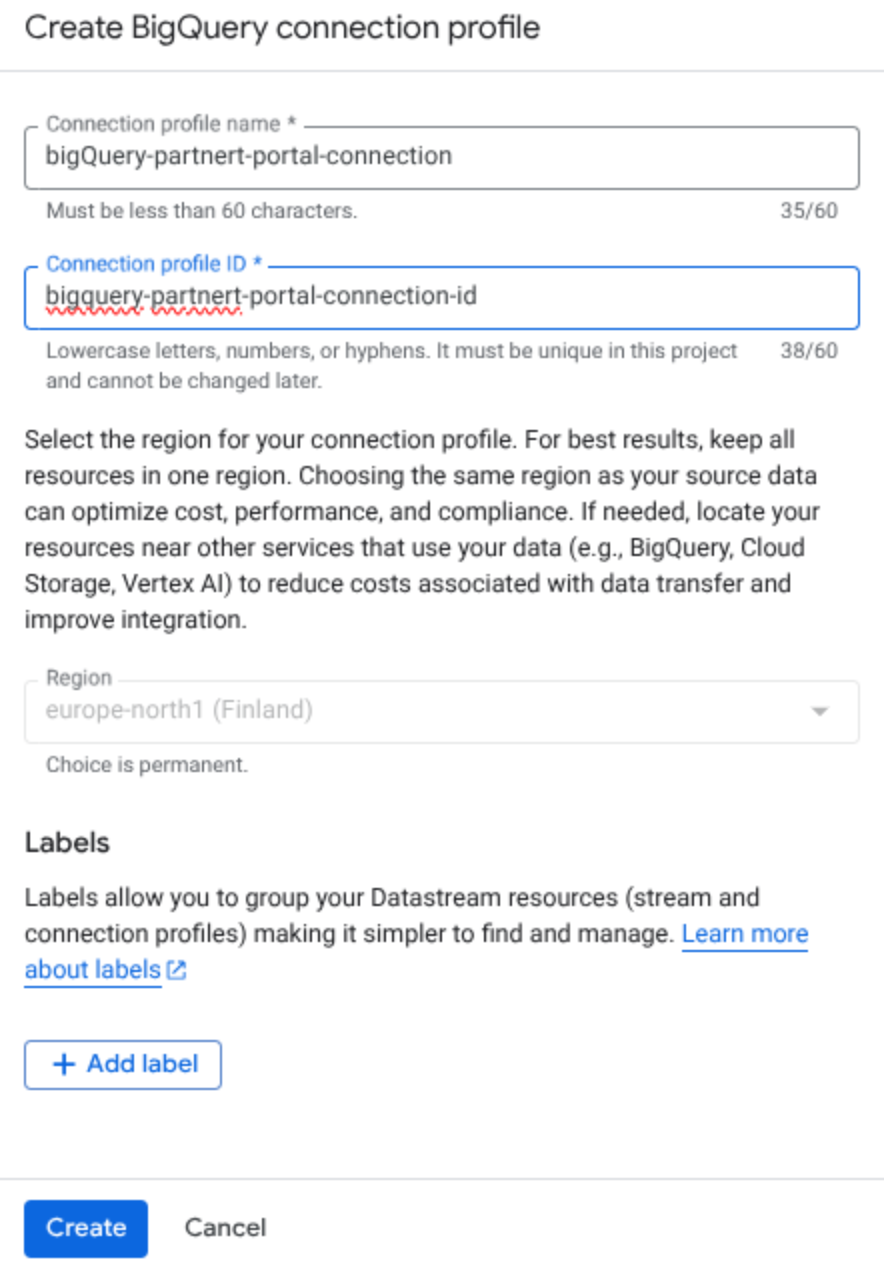
10. In the Define destination section, click in the combobox and select Create connection profile.
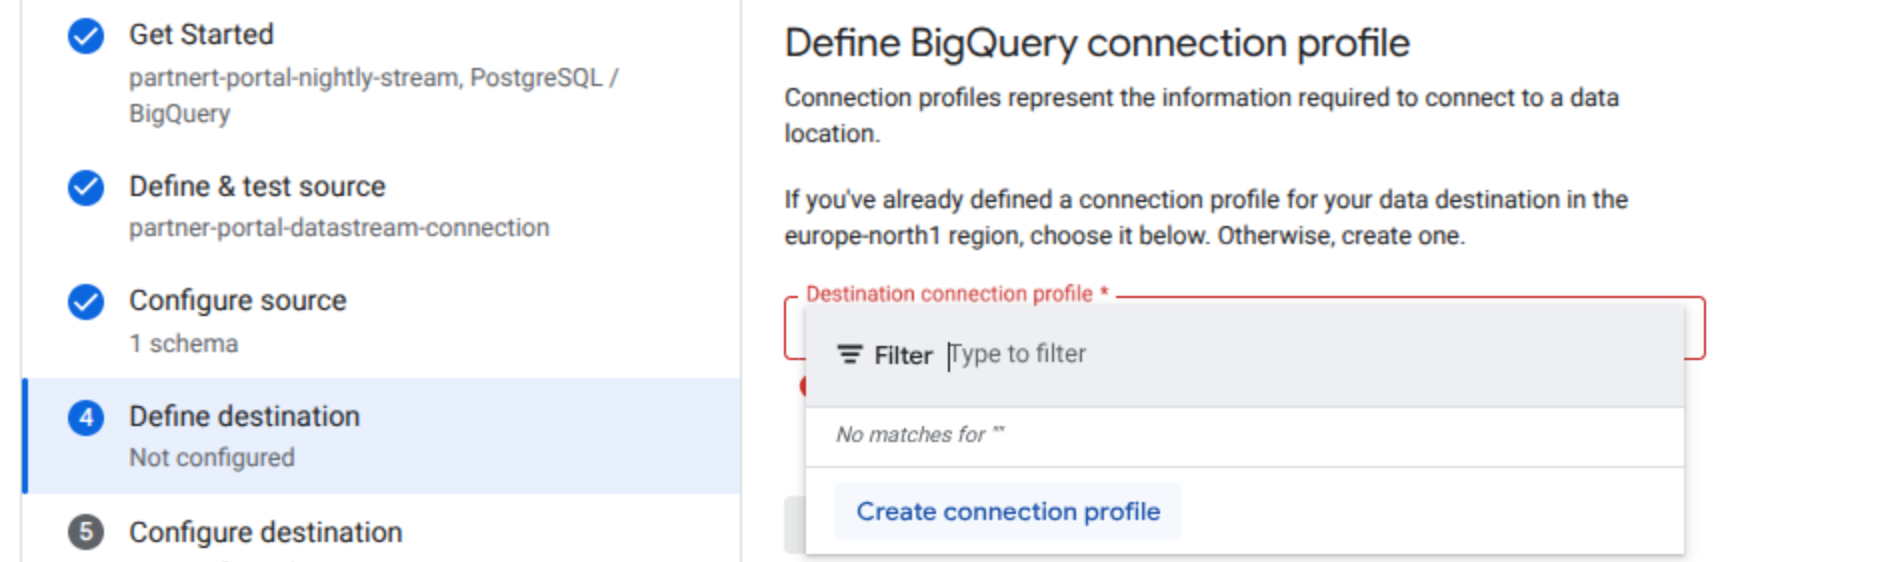
Once you clicked it, the following menu will appear. Give meaningful names to avoid future confusion. Once you have your names setup, click Create.
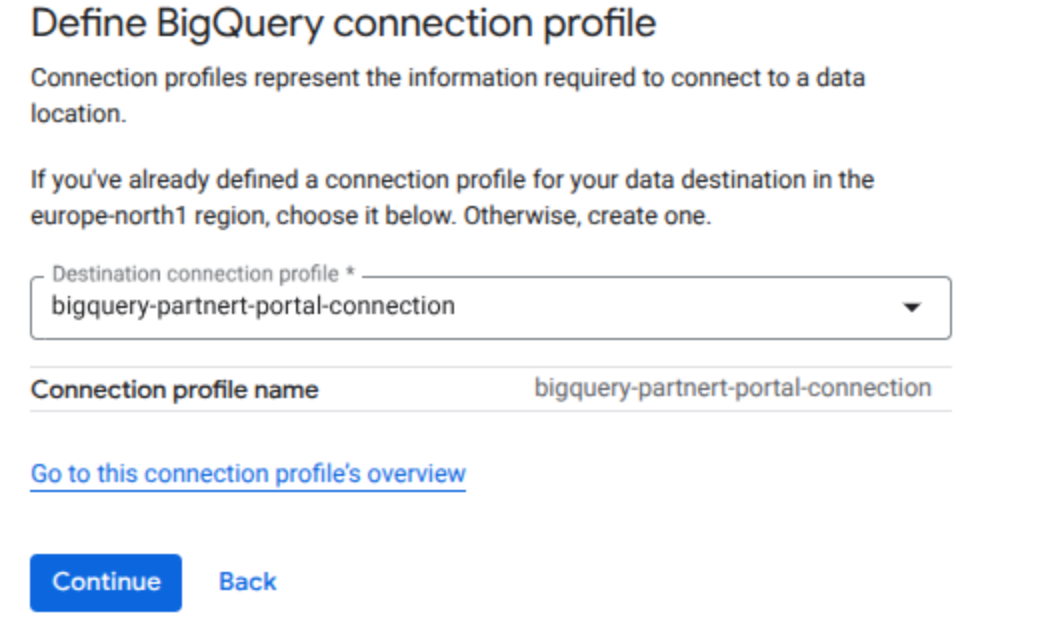
Now the name of your connection should appear here like so. Click continue.
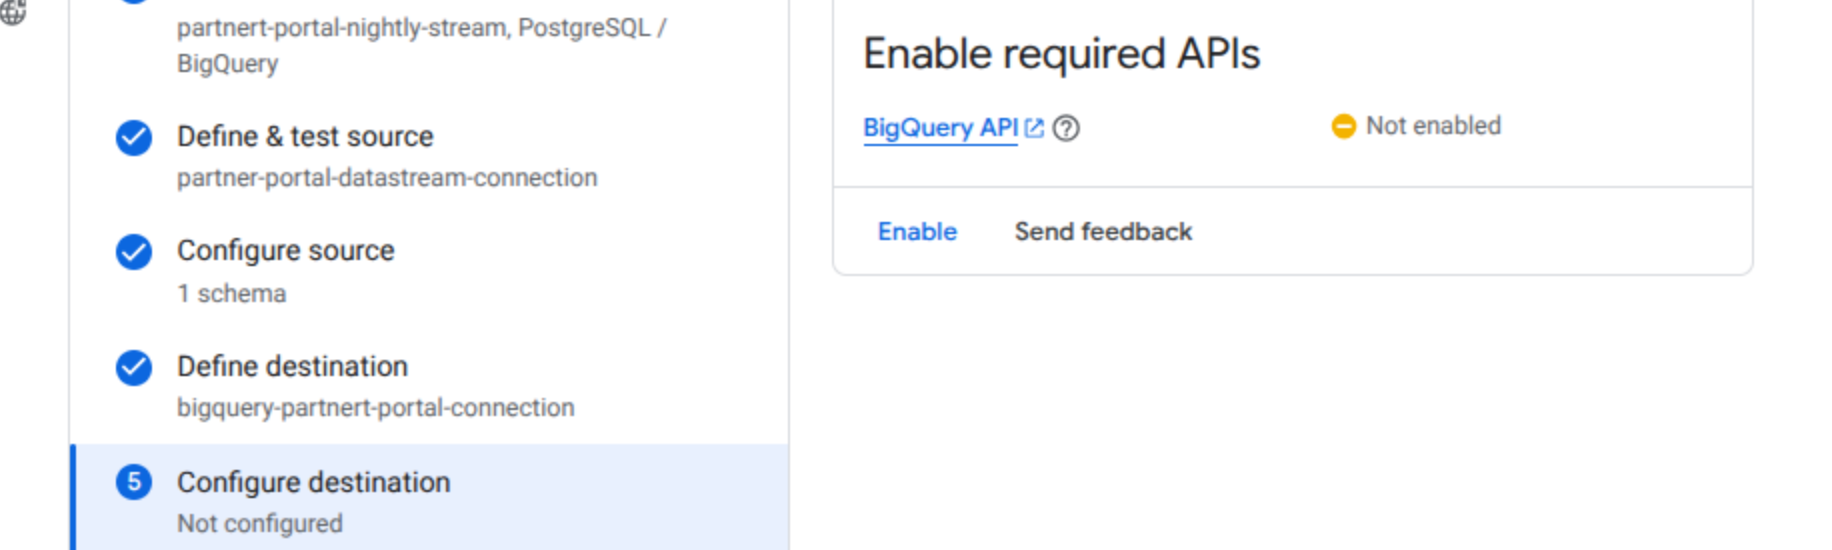
11. In the Configure destination you might have to enable the BigQuery api.
12. After you anabled the api the following form will appear.
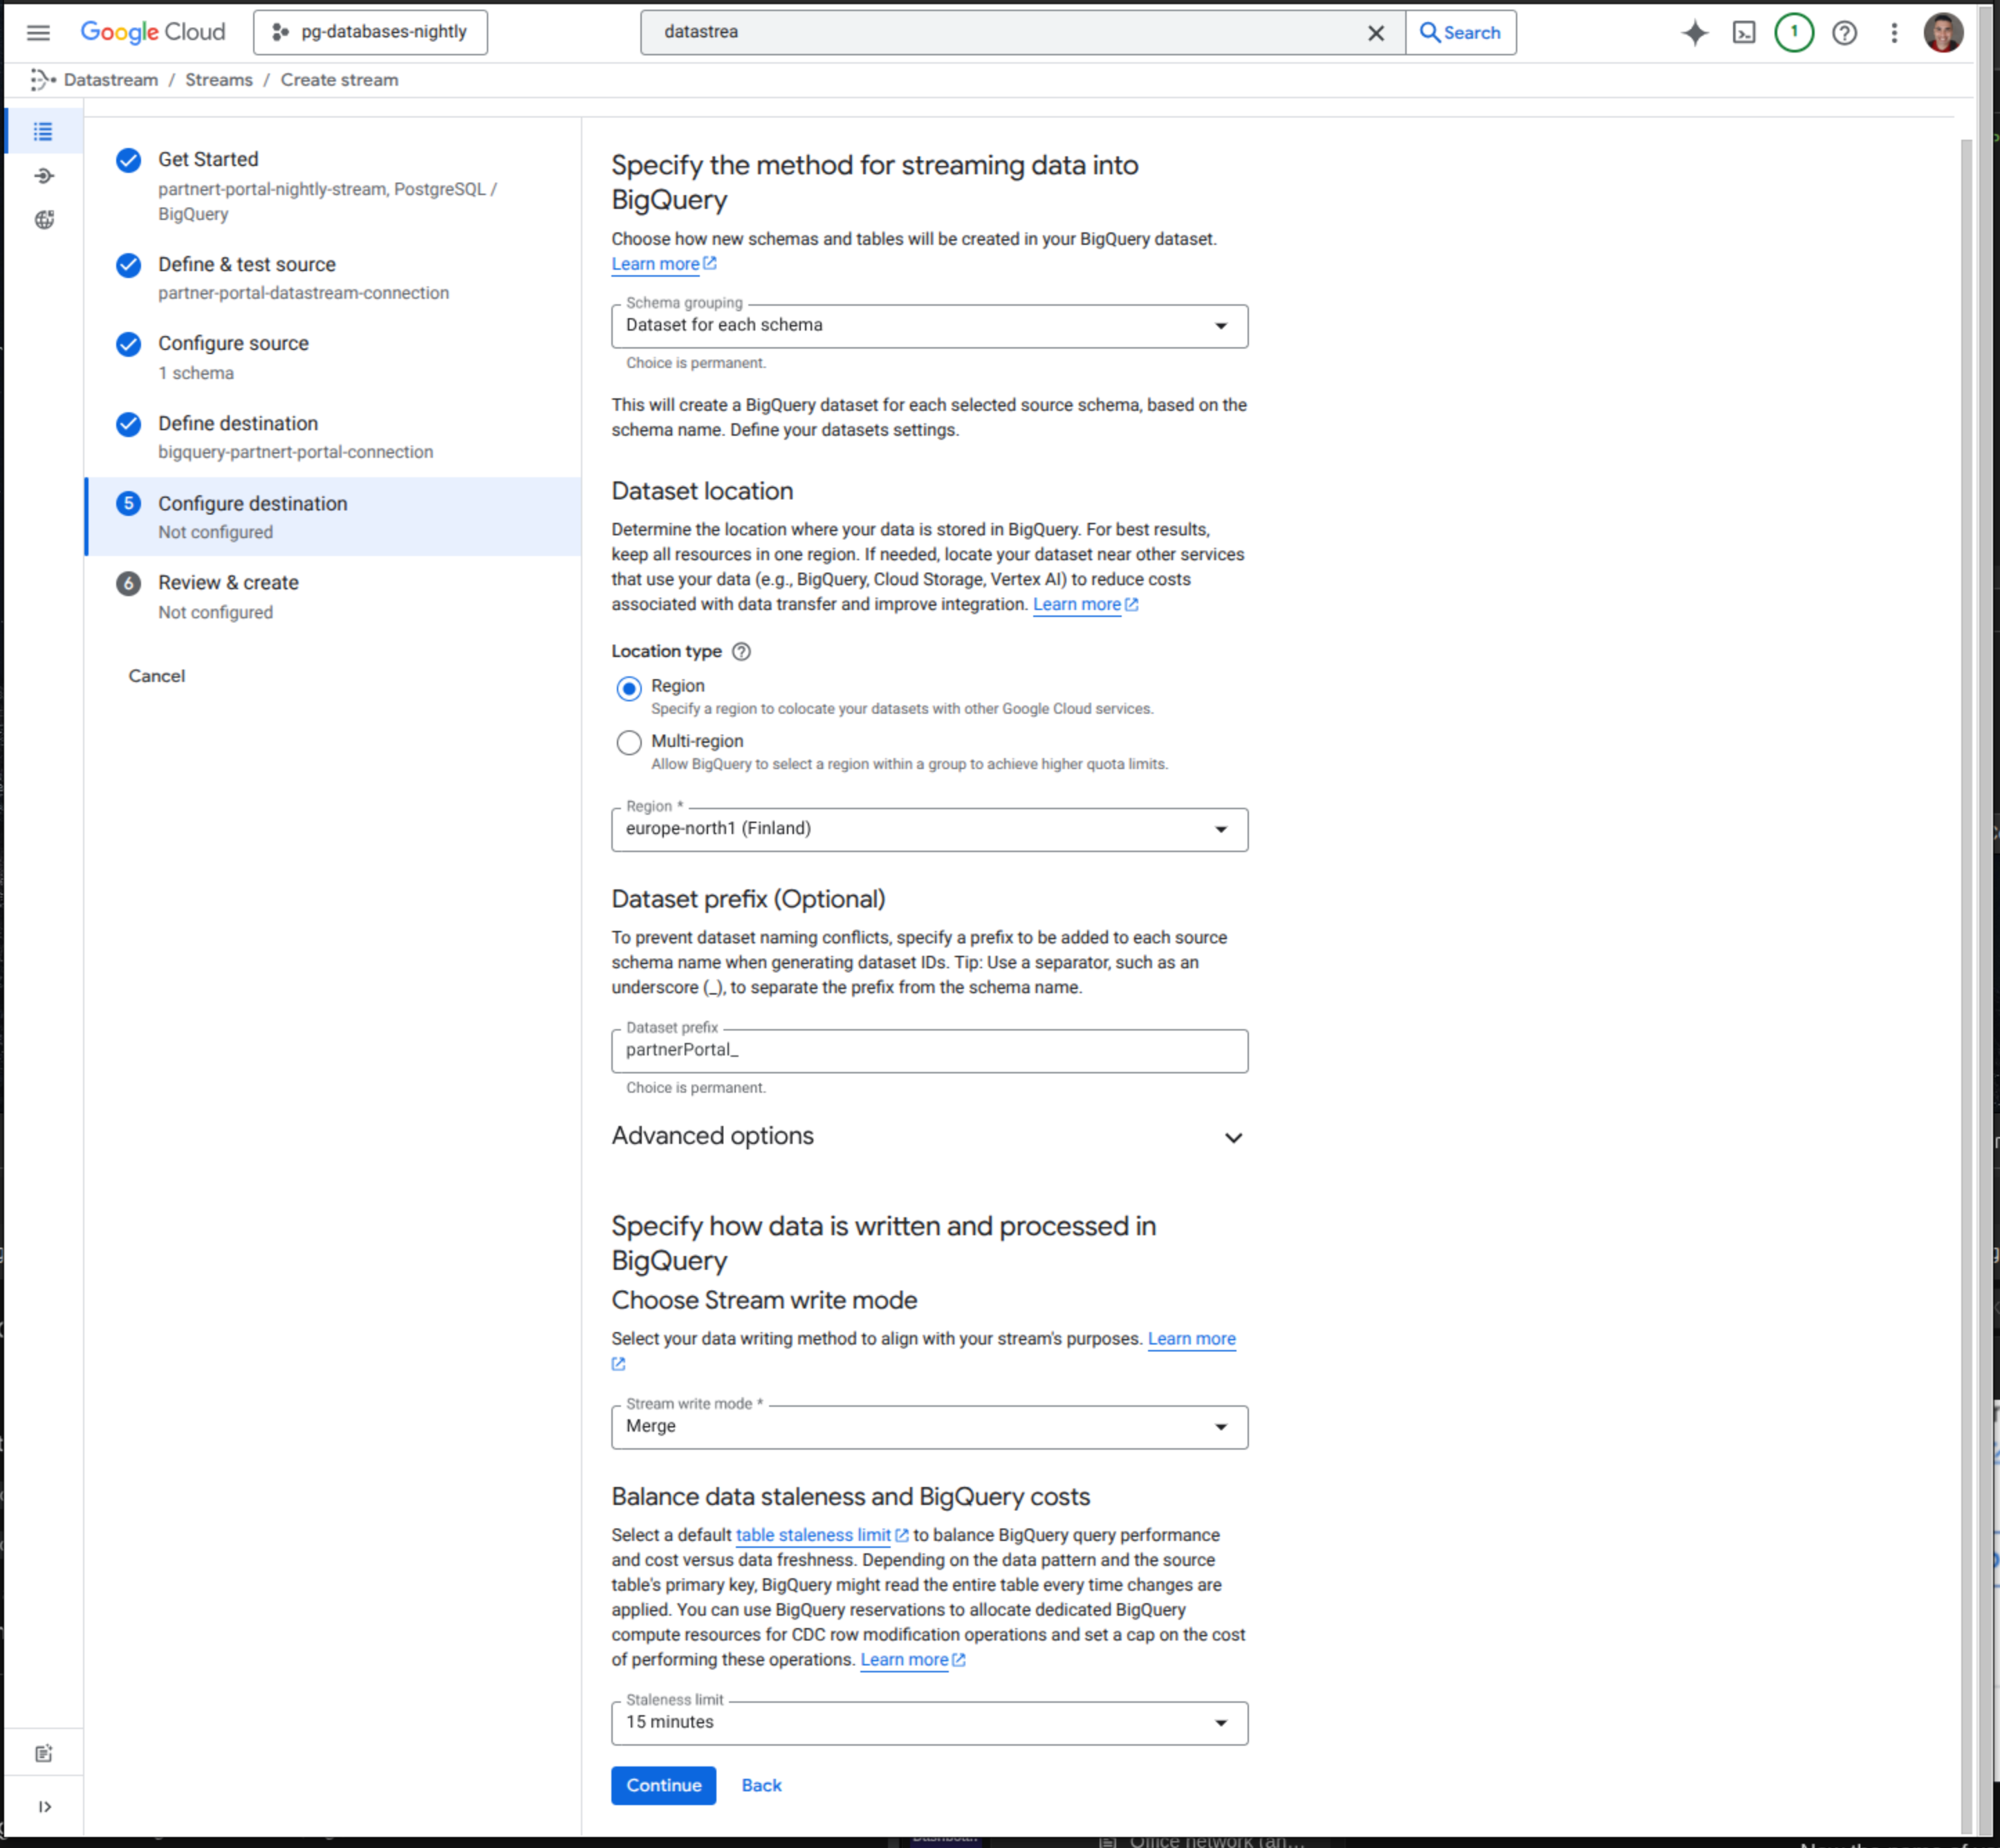 If you want live updates select the staleness limit to 0, just be aware this will increase cost.
Once you are ready click continue and after Run validation.
If you want live updates select the staleness limit to 0, just be aware this will increase cost.
Once you are ready click continue and after Run validation.
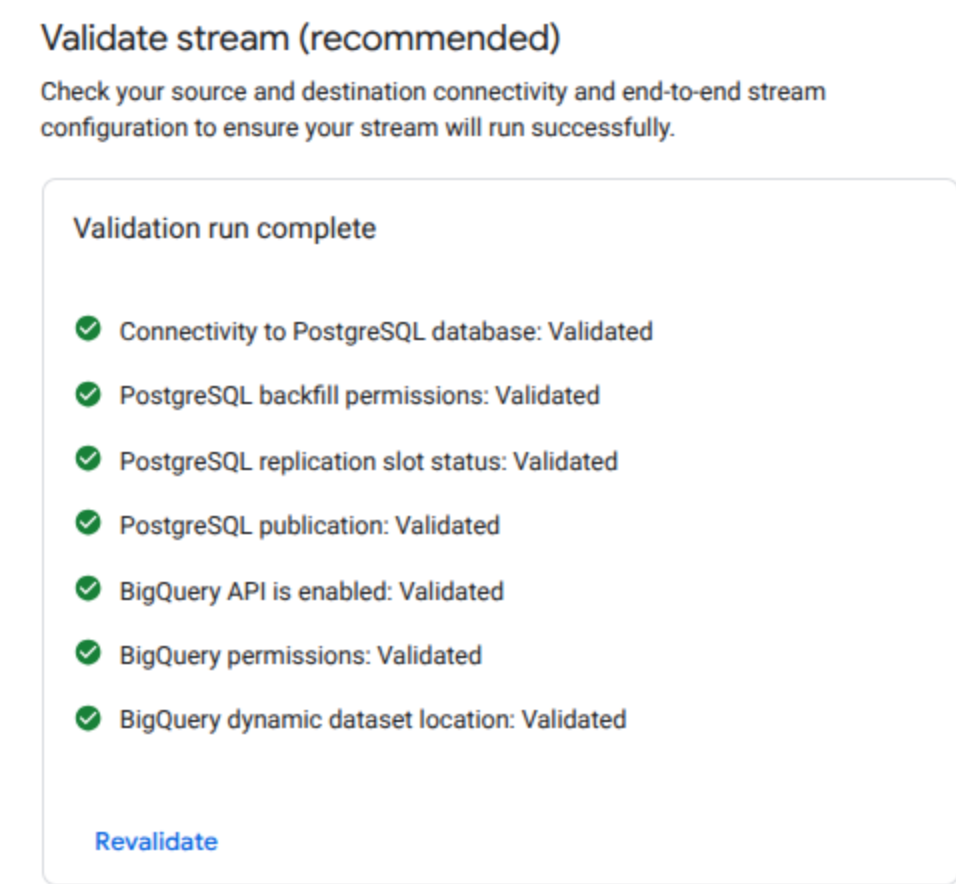
If everything goes well, you should see something like this. After click on Create.
13. Click on Start and navigate to BigQuery → Studio and look for the connection name. Inside you will find the dataset with the tables pertaining to the schema.
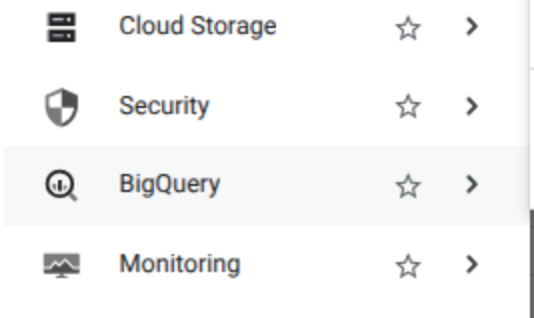
This is the dataset in this case we can see.
To test it we have a run the following query and as it can be sen we get the data.
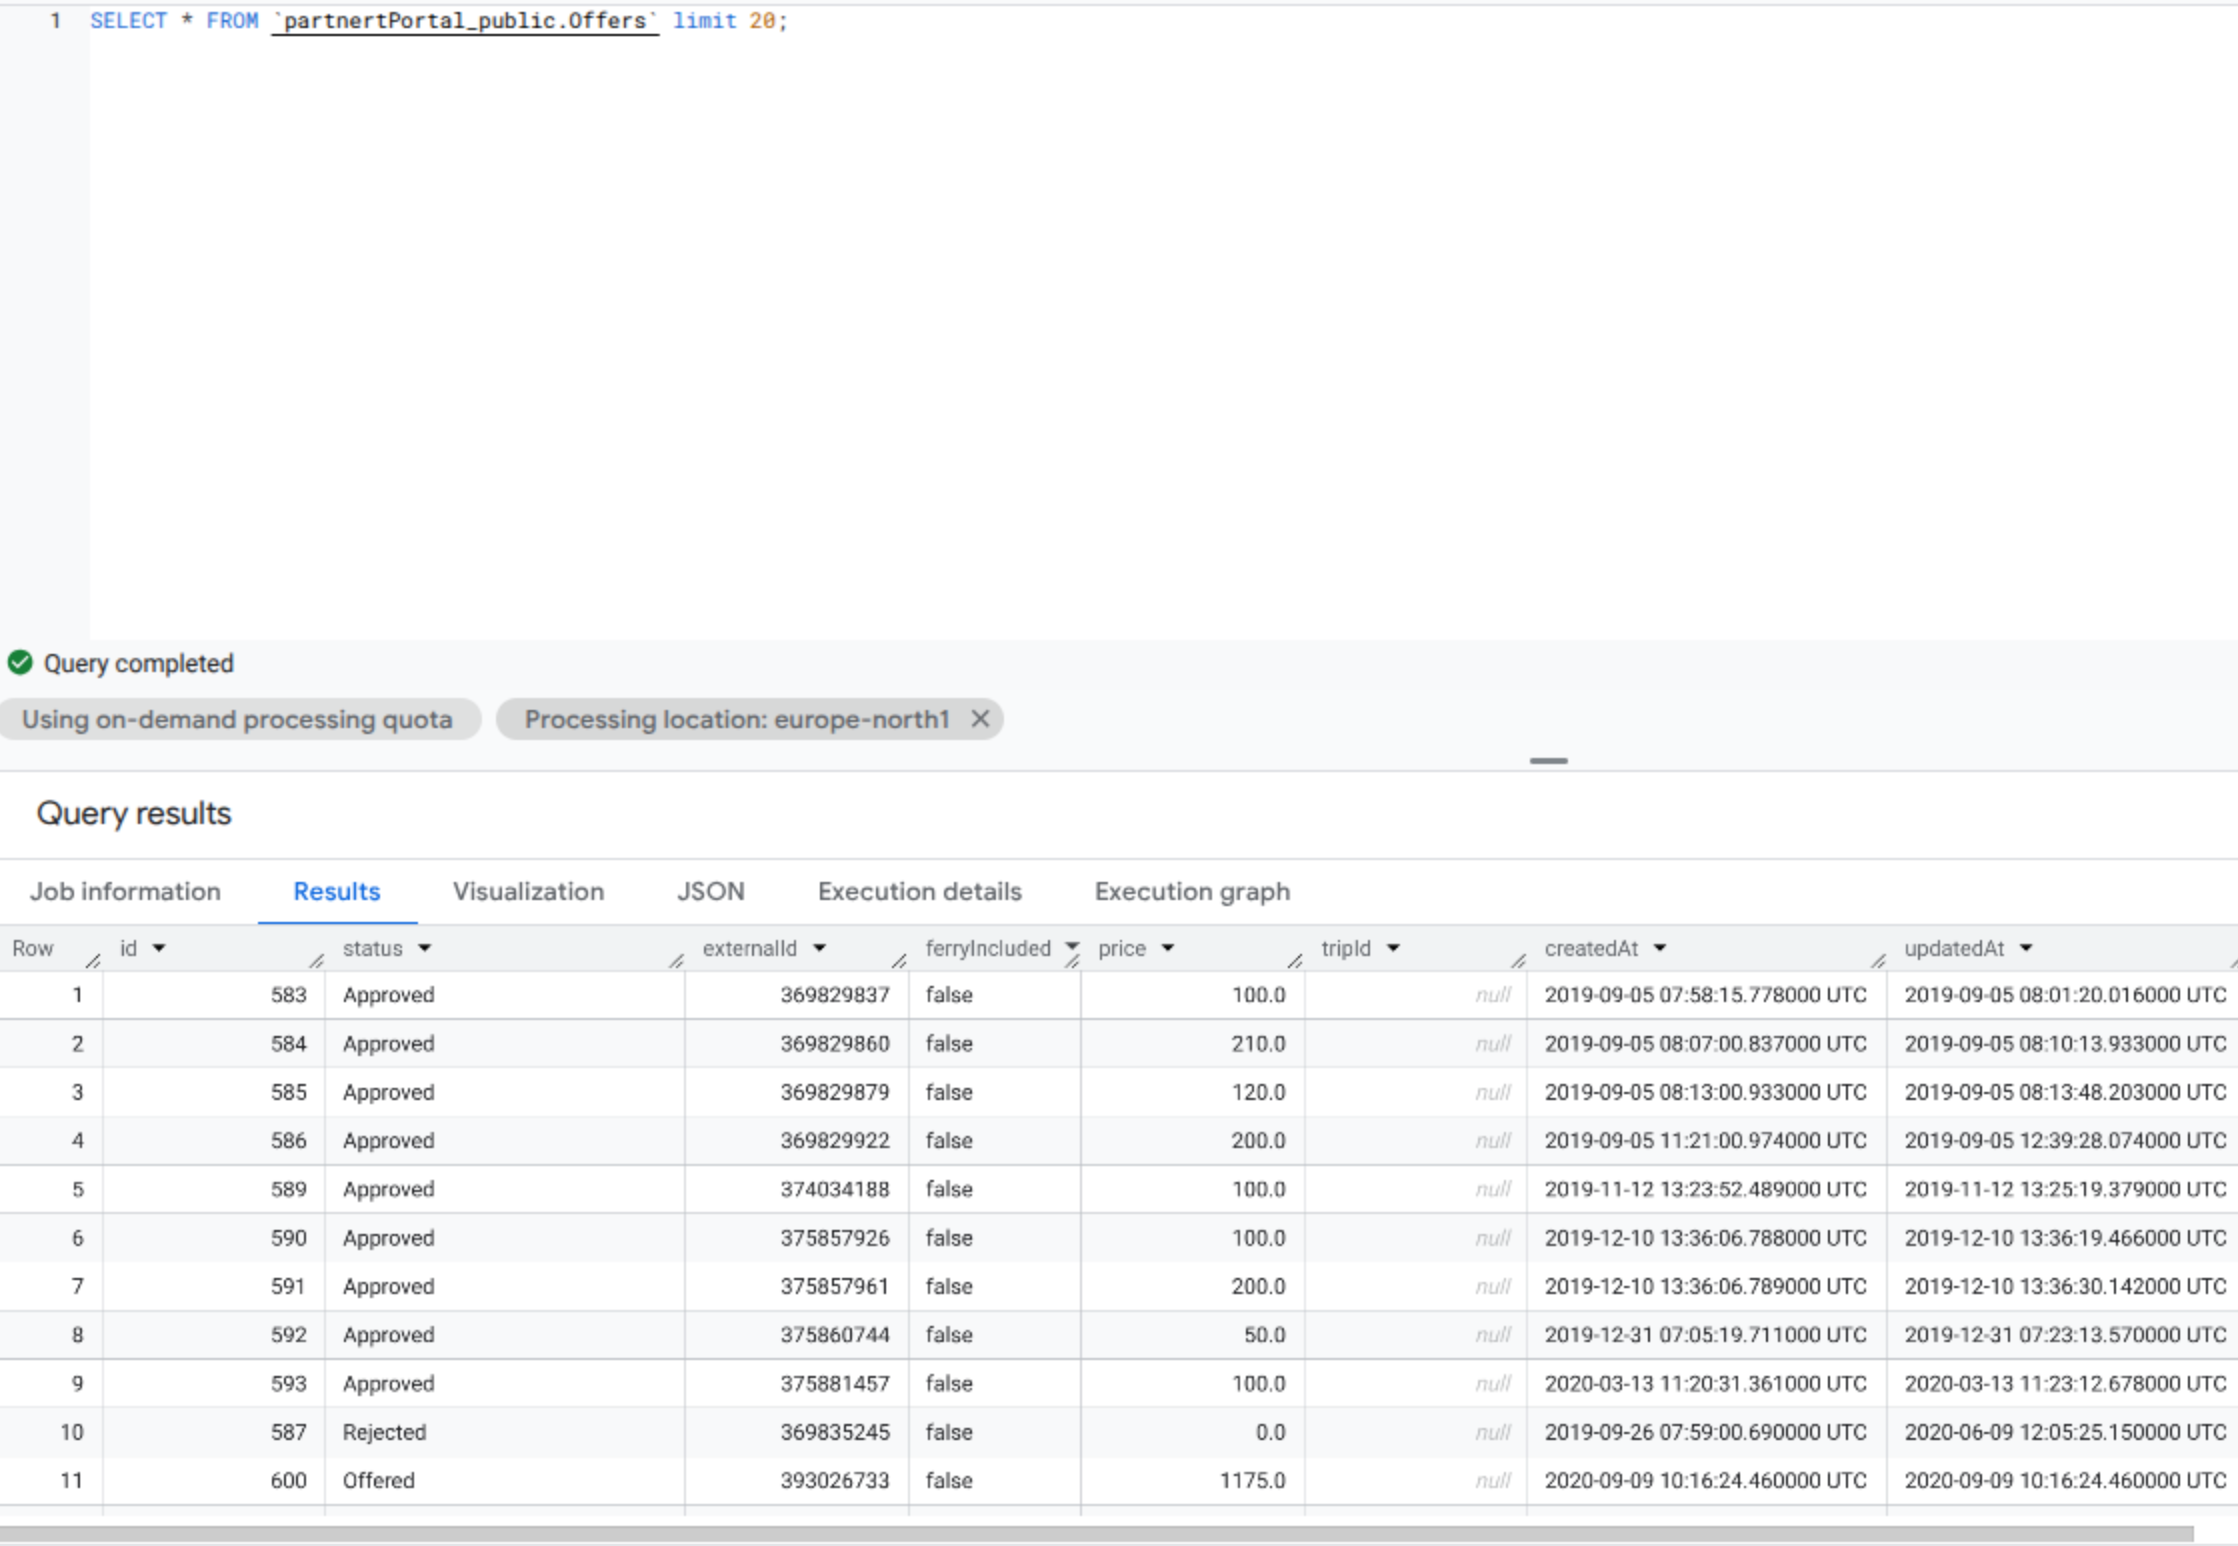
Note By default the query tool is setup to look for data in the US location, therefore you need to setup the query tool to the right location.
Creating views
Before, we created views directly into the database and we gave access to airbyte to this views. With Datastream→ BigQuery setup, we cannot do this. The views need to be created directly into BIgQuery. The following step will show how to do created these views to only give access to the information we want them to see and nothing else.
-
Creting new dataset.
- Navigate to the BigQuery Studio. Press the three vertical dots and select Create new dataset.
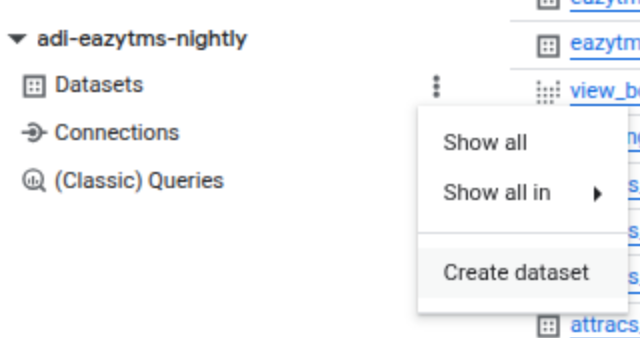
- Navigate to the BigQuery Studio. Press the three vertical dots and select Create new dataset.
-
- A new form will appear. Fill the require information. Make sure you pick the correct region. It must match the region where the data is.
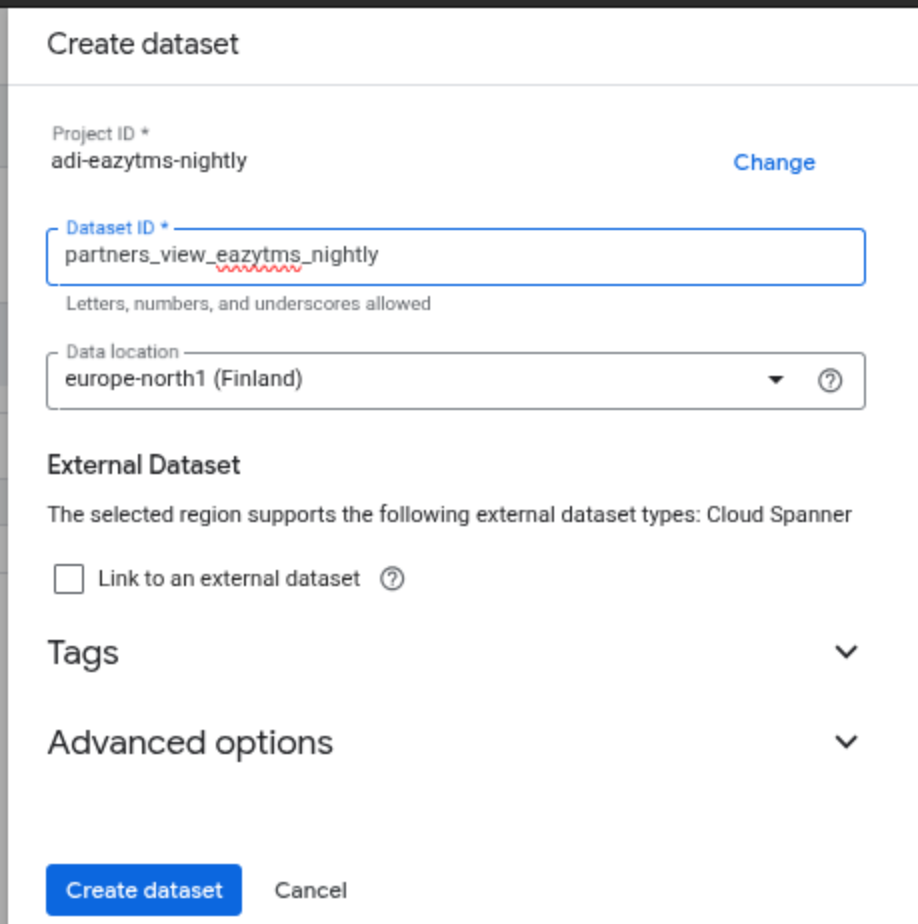
- A new form will appear. Fill the require information. Make sure you pick the correct region. It must match the region where the data is.
-
- Click on the newly created dataset and open a new sql query tool. I run the query to create the vew. Pay attention and make sure you are creating the view in the right dataset. By default the format to follow in Bigquery goes as follow:
Project_ID.Dataset_ID.View_Name
- Click on the newly created dataset and open a new sql query tool. I run the query to create the vew. Pay attention and make sure you are creating the view in the right dataset. By default the format to follow in Bigquery goes as follow:
Therefore, if you look at the picture bellow, you'll see that we are telling to create the view in the project adi-eazytms-nightly, in the dataset called partners_view_eazytms_nightly with the view name view_booking_summary . Once the query is ready click on Run to execute the query.

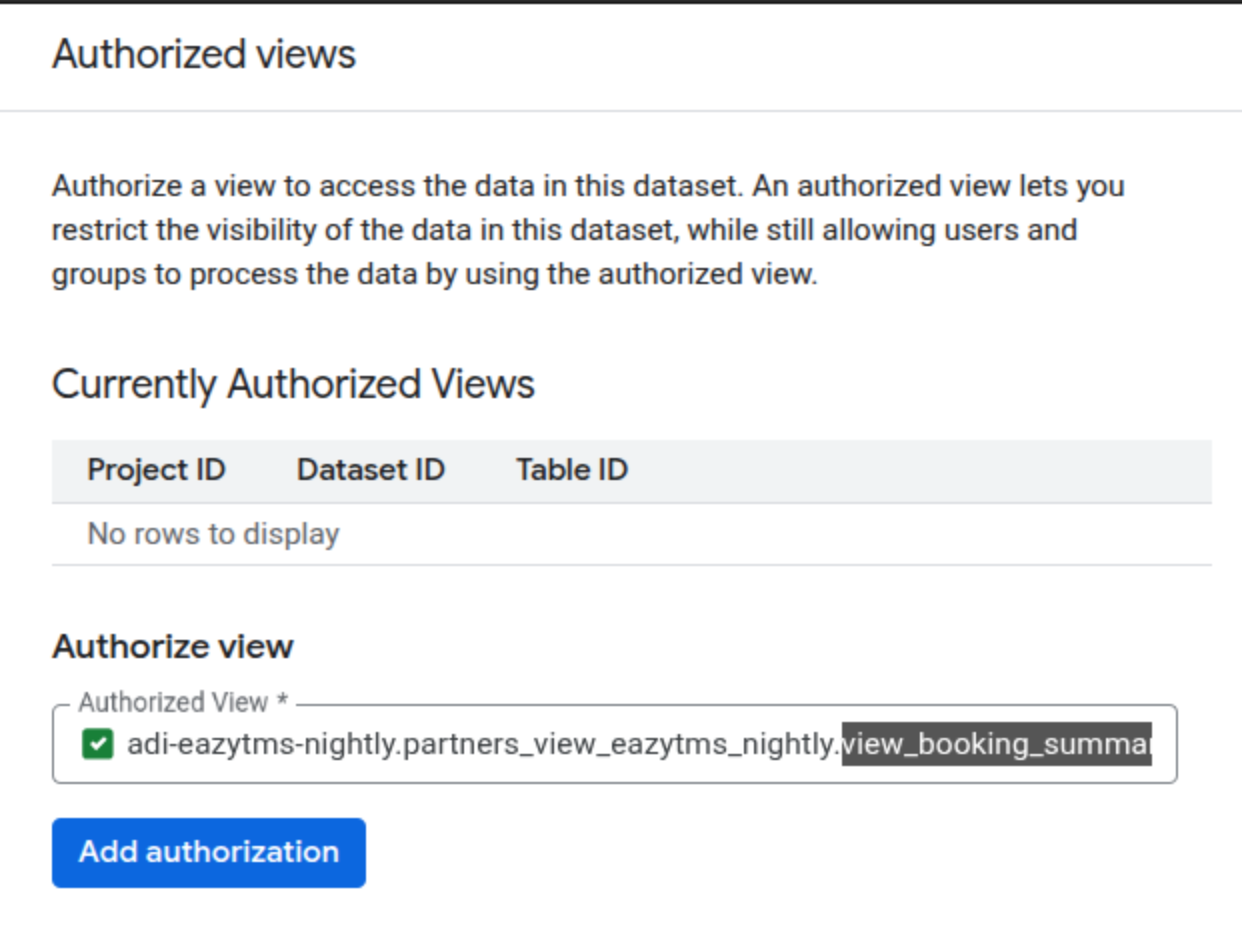
Now, we authorize. So, Basically we need to tell BigQuery "Allow this view to read the sensitive data, but don't let the user read it directly."
- Go to the ORIGINAL dataset (In our example was
eazytmsNightly_ahola_transport) in the left menu. - Click the Sharing button (top of the detailed pane) -> Authorize Views.
- Click Authorize Views (again in the pane that slides out).
- Type to search for your NEW dataset:
view_booking_summary. - Select the view you just created:
view_booking_summary. - Click Add Authorization.
NOTE. Remember that your setup will have different names.
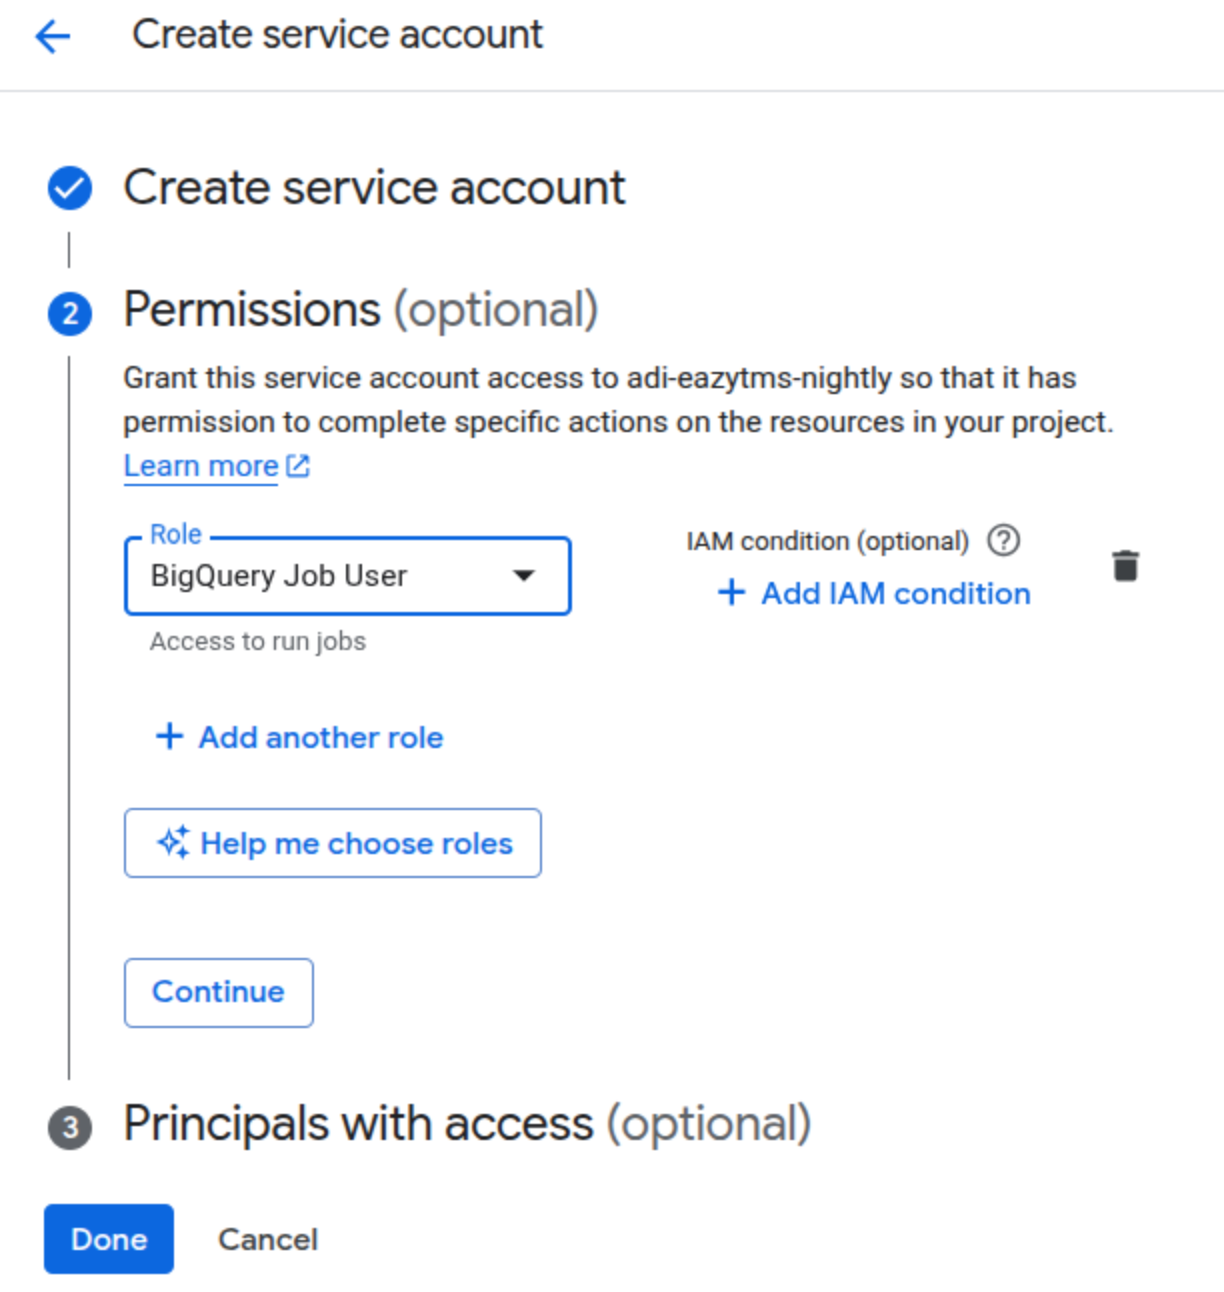
Now we need to grant access ONLY to the new dataset. We are going to invite the Powwer Bi user or service account. In this example we will use service account. Remember that the service account must be previously created.
When you create the service account at the project level give this role only: BigQuery Job User.
This role allows the Service Account to "spend money" (run query jobs) in your project.
* Critical: This role does NOT let it see any data. It just lets the engine start.
* Do NOT use: BigQuery Admin or BigQuery Data Viewer here.
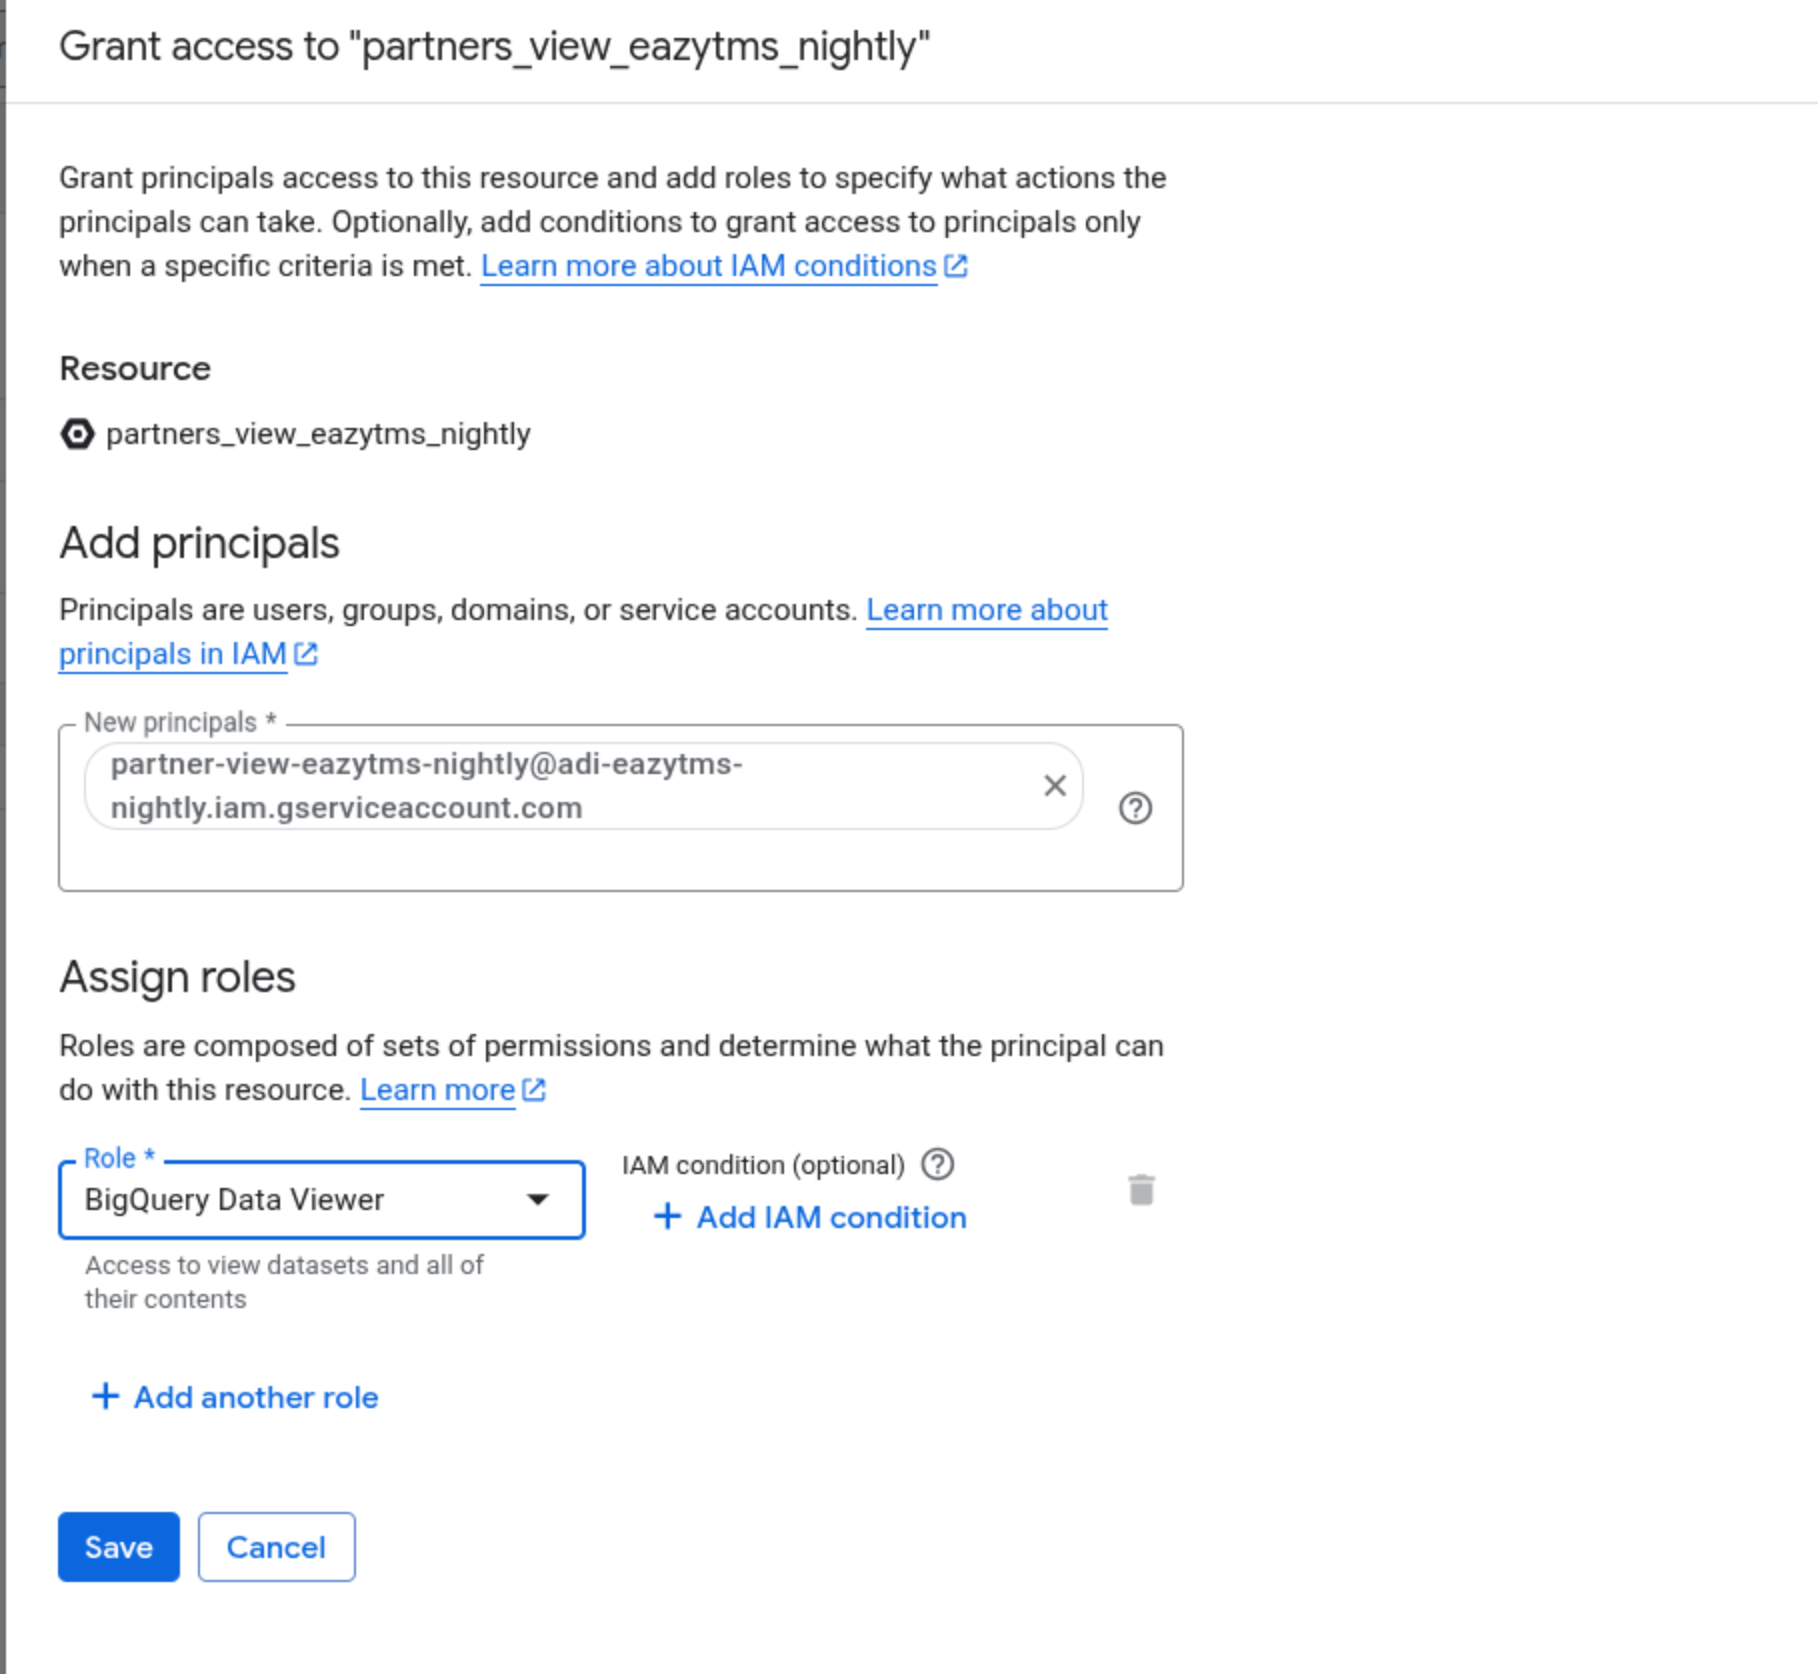
Dataset Level: "Permission to See the View"
* Where to set it: Go to BigQuery > Click your NEW dataset (eazytms_nightly_partner_views) > Share > Manage prmissions.
* Role: BigQuery Data Viewer
* Click Save
* Why: This lets the Service Account read the tables/views inside this specific folder only.
* Because you are setting this on the dataset (not the project), the Service Account effectively has "blinders" on. It cannot see the raw booking table because it has no rights on that other dataset.
Since this is a Service Account, Power BI will ask for a JSON Key file.
1. Go to IAM & Admin > Service Accounts.
2. Click your new Service Account.
3. Go to the Keys tab > Add Key > Create new key (JSON).
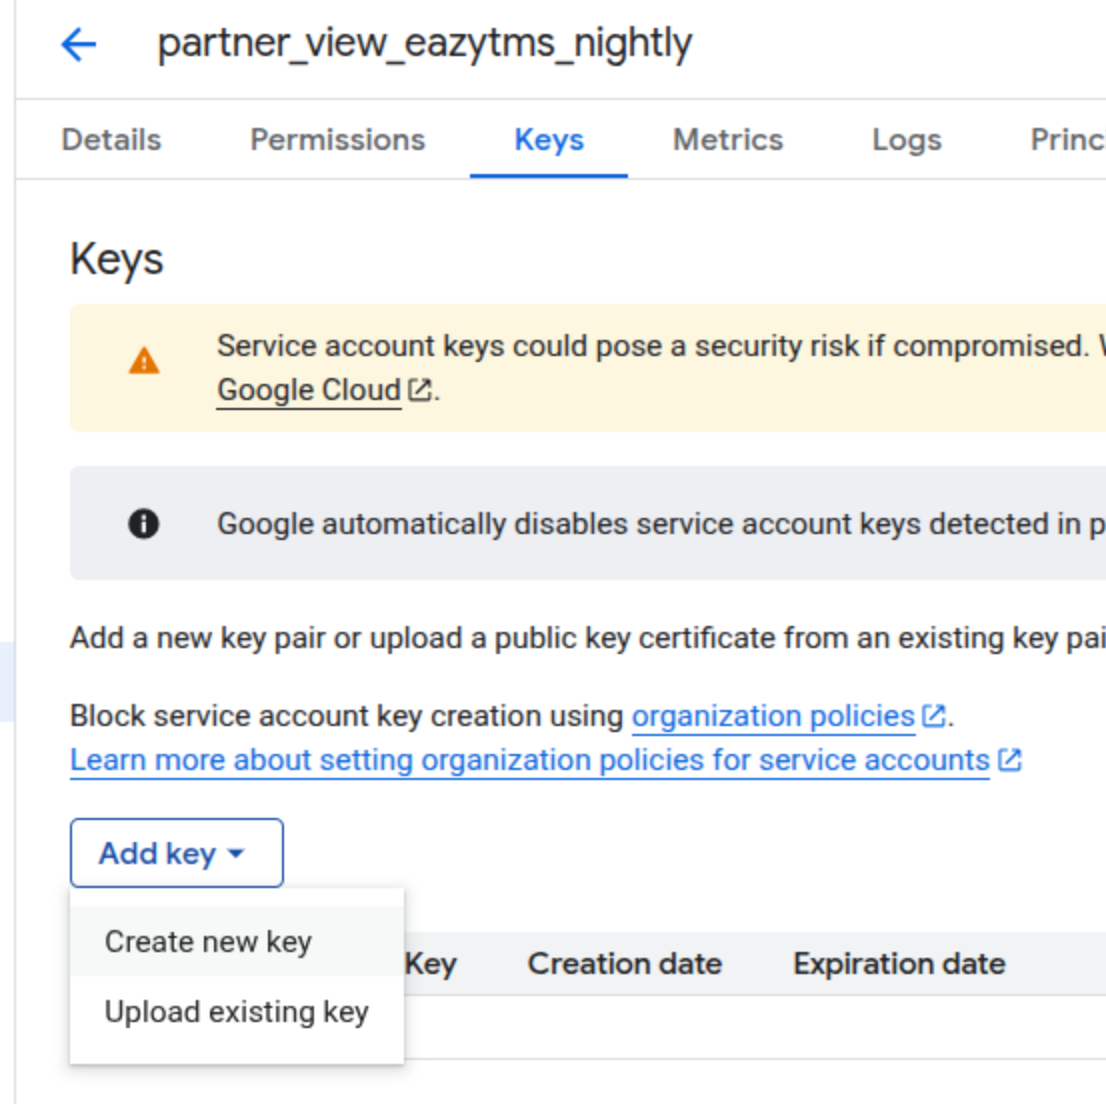
- Save this file securely—you will upload this into Power BI when prompted.
Power BI setup
1.Connection In Power Bi select Get data -> Google BigQuery Paste the the email address of the service account and the content of the JSON file you downloaded previously. Also, select Privacy Lever: Organizational.
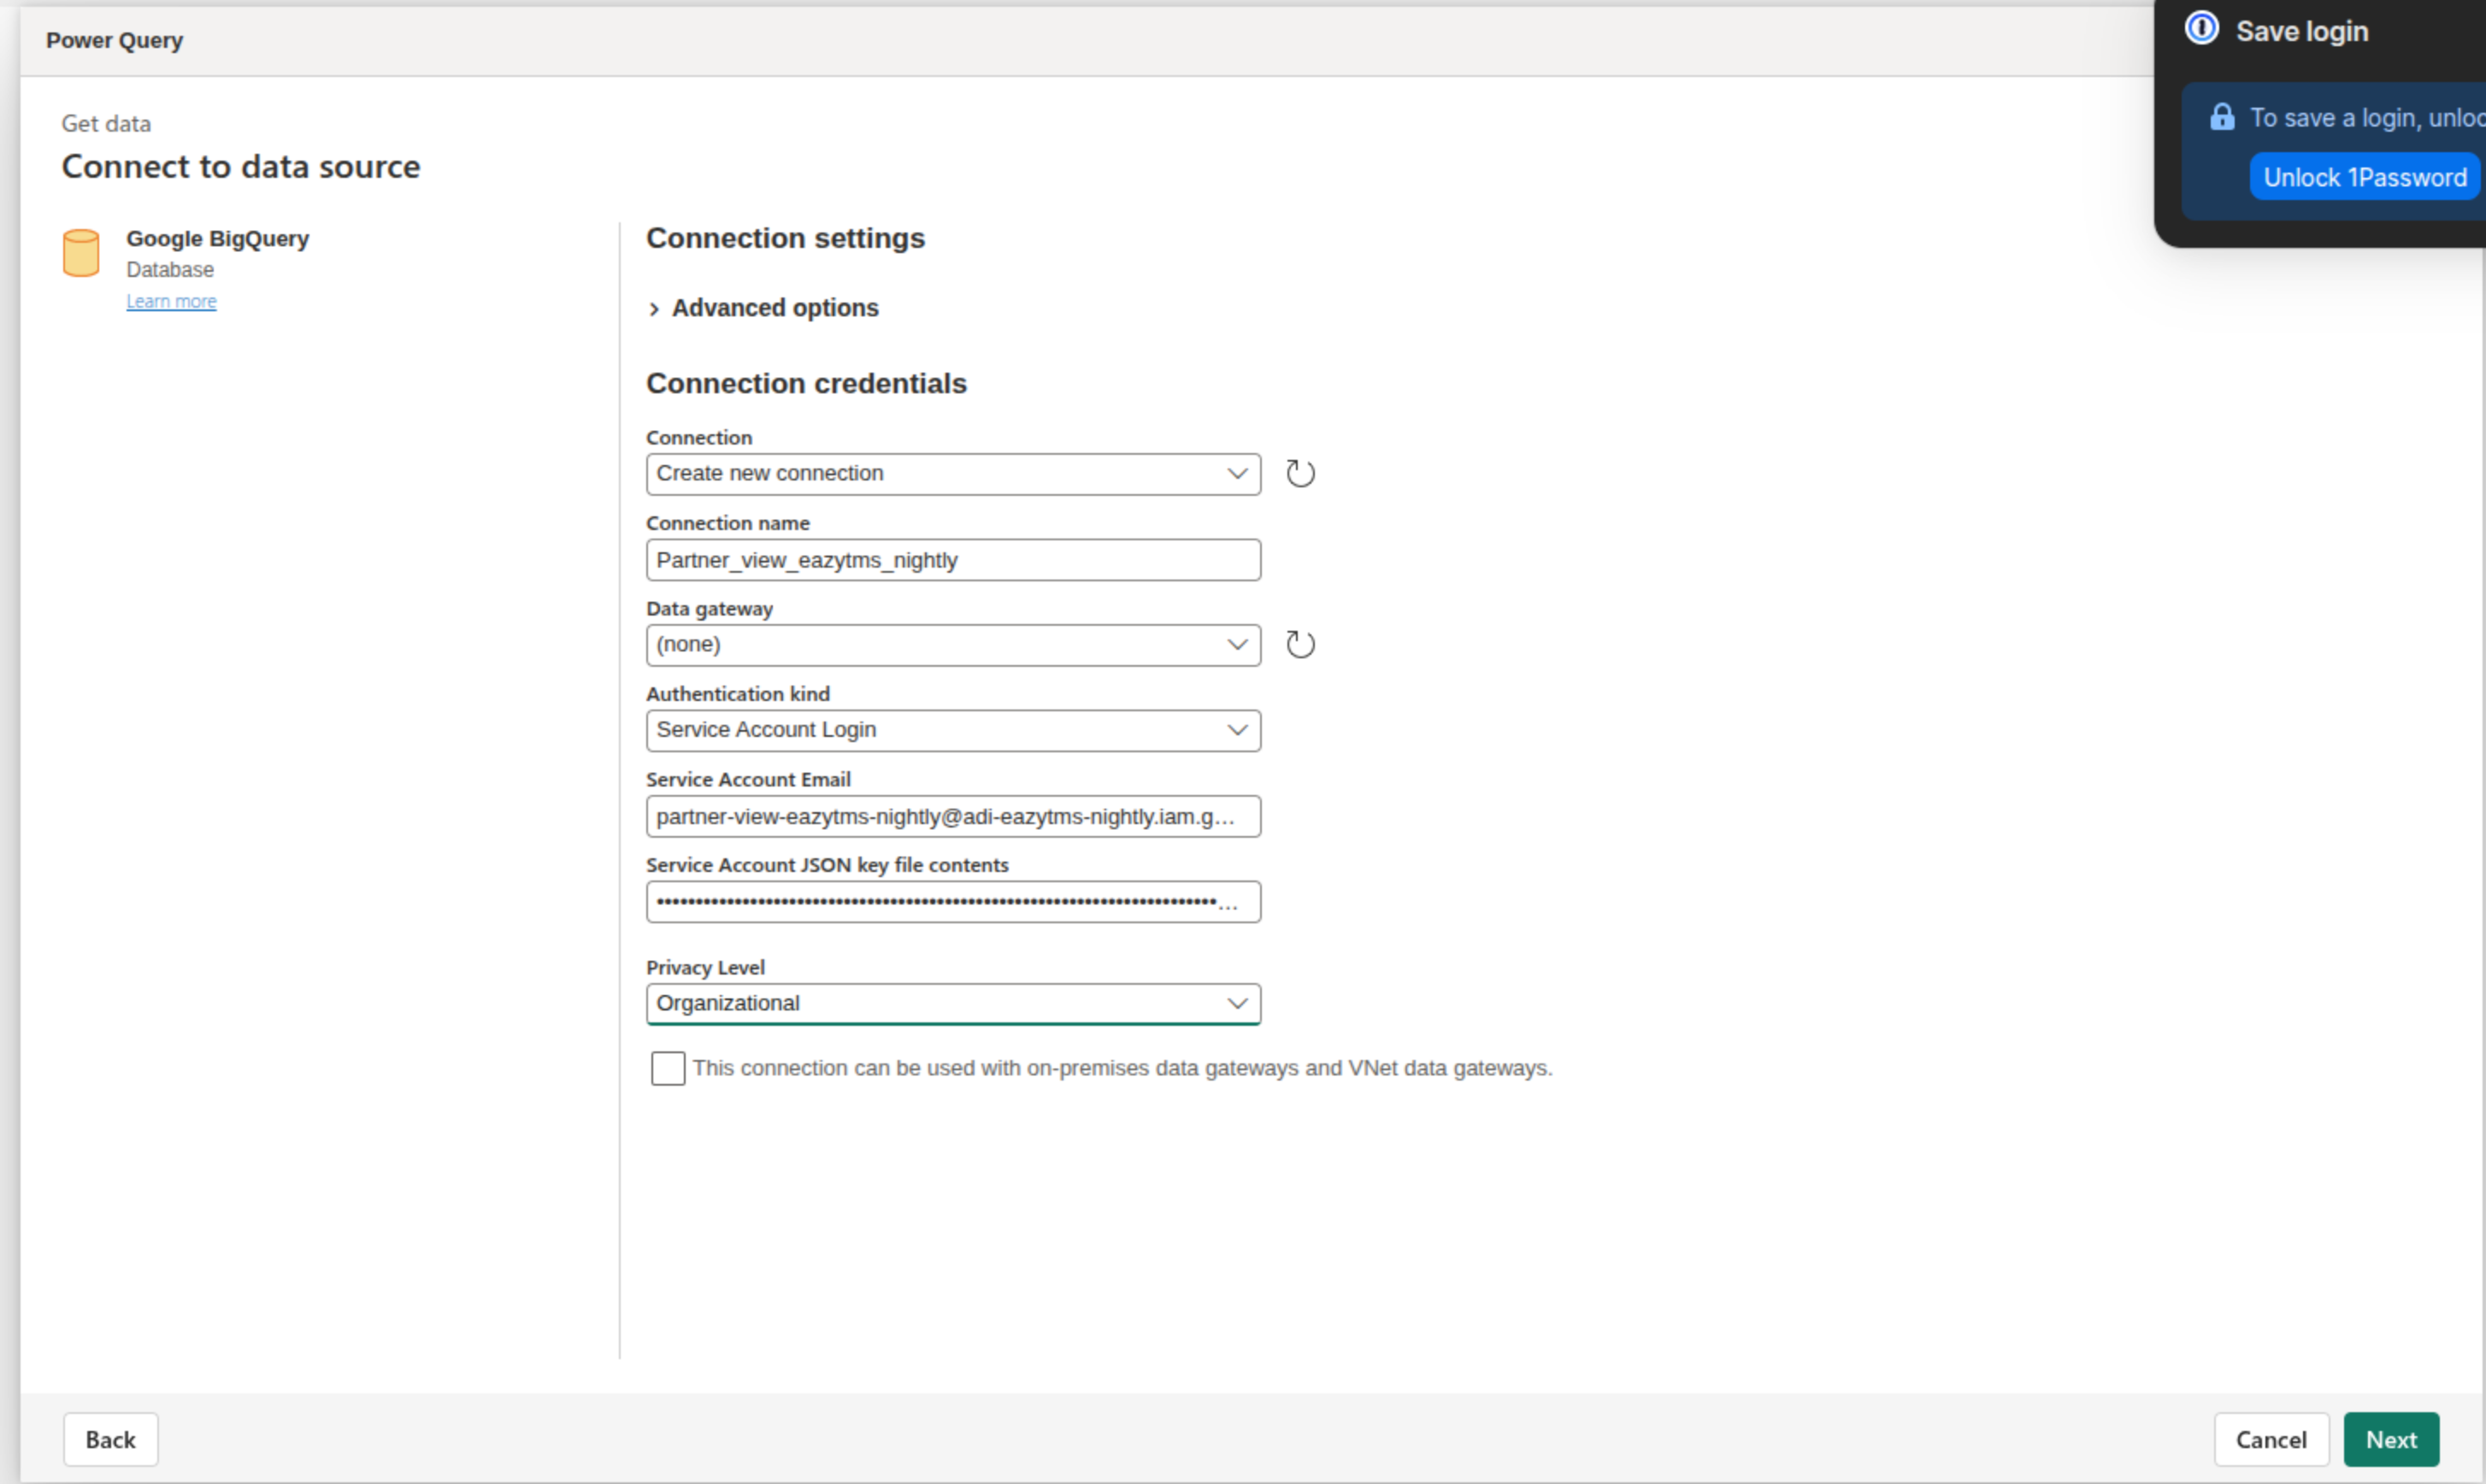
If everything was setup correctly you should see just the view table and nothing else.