GCP Load Balancer: Migrating from classic to modern LB
Google has released a new version of their Application Load Balancer, the old one is now called classic and the new one is called Application Load Balancer and in some cases, modern. In short, here are the defining features of each version (more here): Old, classic load balancers: * Available as a regional and global * Only offers limited load balancing methods and the new modern load balancer: * Split into Global and Regional load balancers * The new load balancers use the open-source Envoy proxy * Offer better load balancing algorithms (round robin, least connected etc.) and even an input field to customize the load balancing.
New GCP Migration tool
Phase 0: Monitoring and logging services
Todo: Where to check load balancing monitoring?
Phase 1: Prepare the backend service migration
Note: Eventually you have to migrate all of the applications in the "forwarding rule" of the load balancer or remove the un-desired backend services from the load balancer. Removing a backend service from the load balancer does not destroy it.
- Navigate to Load balancers → open up an LB (Load balancer details) → Migration tab
- Before beginning the migration, go and test how the applications you will be migrating are working right now. You will need a baseline to compare against the new migrated backend services.
- Select the backend services by clicking on their checkboxes to choose what backend services you would like to migrate to a modern-lb-compatible version
- Click on the "Manage migration" master button at the top, next to the "Backend services" -header. A side-panel should open.
- Do not click on the individual-level "MANAGE MIGRATION" button, that only takes you to that one specific backend service's configuration page.
- You can confirm that you are configuring all backend services by checking the list in the side-panel called "Selected backend services".
- Start the migration from
EXTERNALtoEXTERNAL_MANAGEDby first going through the "Prepare" radio-button option and clicking save: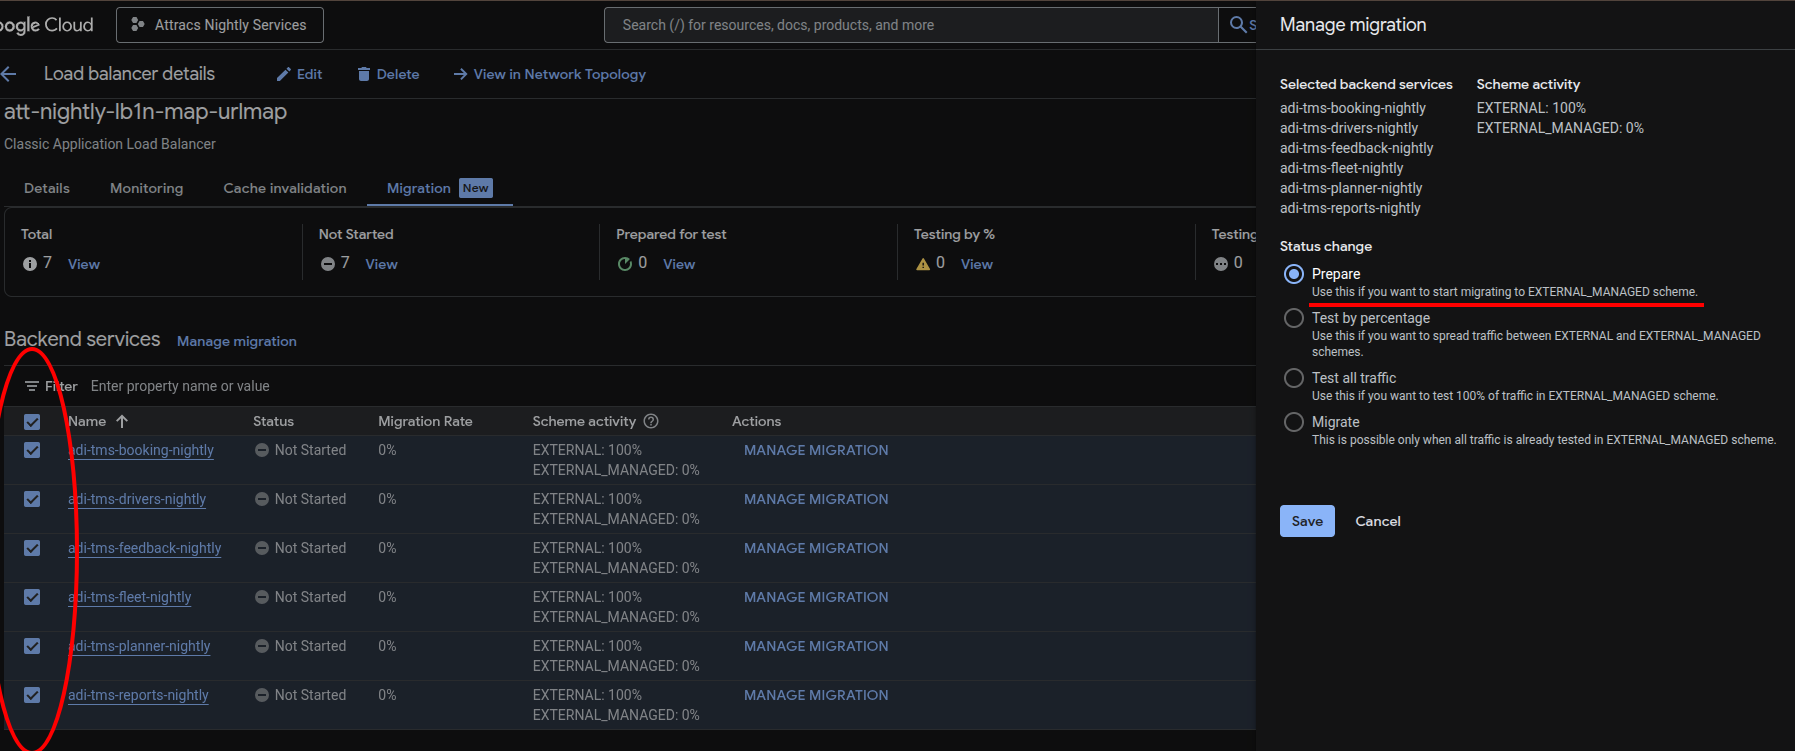
-
- You can also confirm which backend services will be getting migrated from this side-panel view
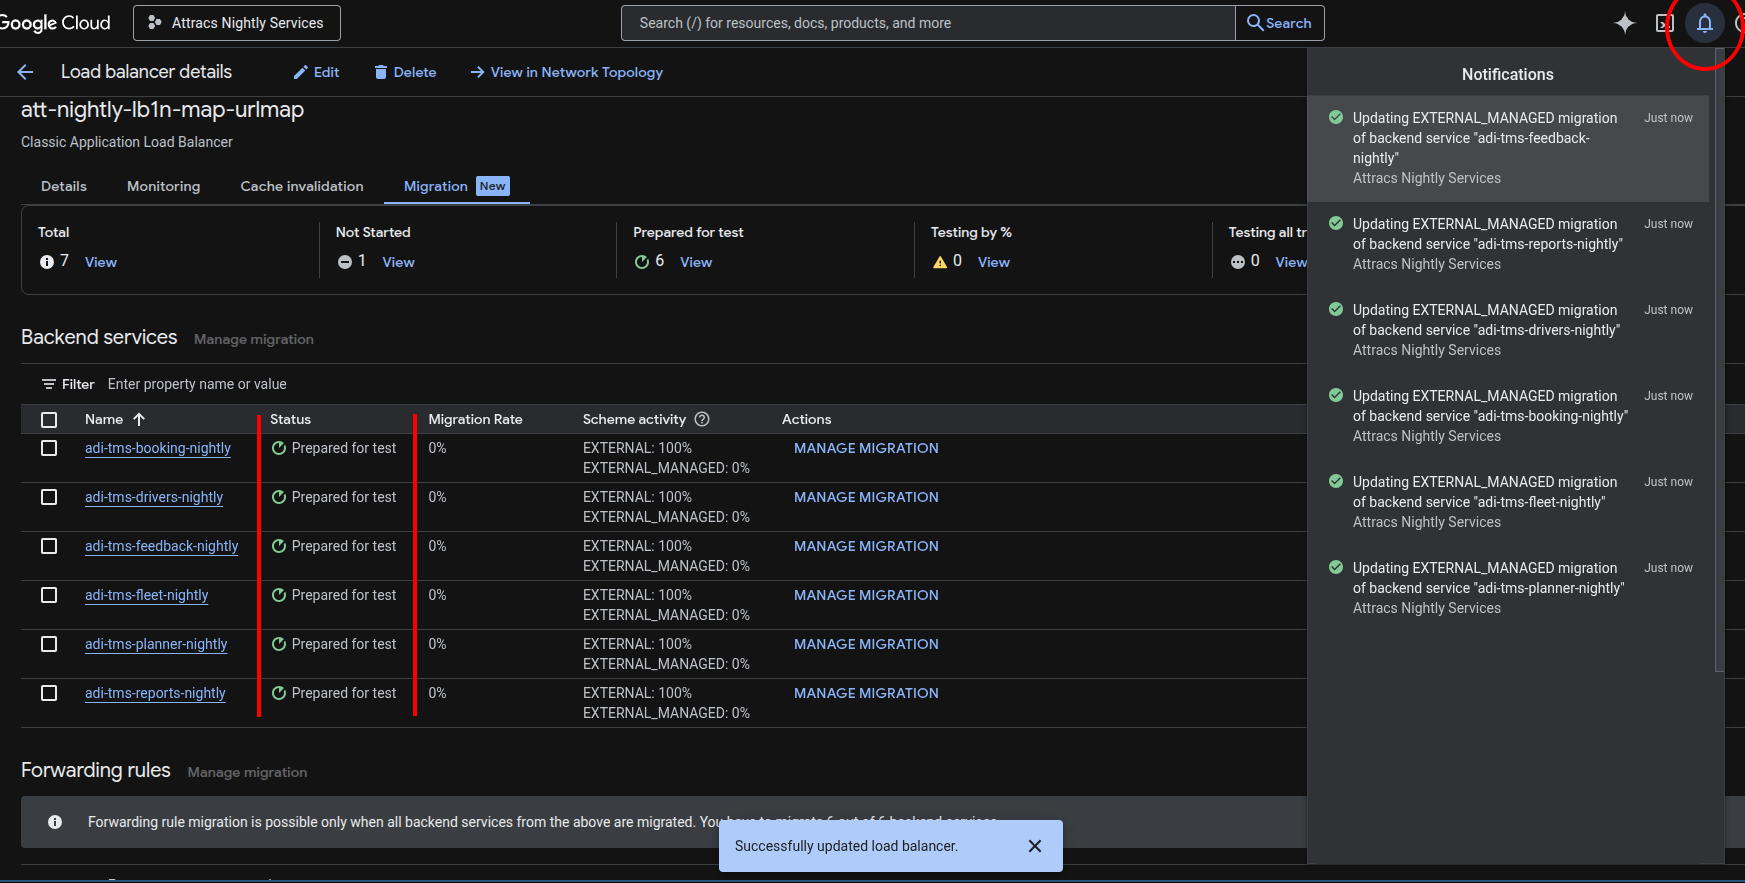
- You will be taken back to the normal view on the Migration tab. You can find the progress of the update from the notifications bell icon on the top right and from the "Status" column.
Phase 2: Test the new backend services
- Select the backend services that you previously applied the migration preparation to and click "Manage migration".
- This time we choose the "Test by percentage" radio button. Enter a desired traffic-split percentage to the input box. The percentage should be something high enough where you have a good chance of landing on the new backend service but low enough to where it won't cause massive disruptions if the new backend service doesn't work correctly. Something around 33% might be good.
- Click save and test your applications now. Compare your findings to the baseline. If everything still looks good, go ahead and continue increasing the percentage so that the majority of the traffic will be sent to your new backend services. Something like 80 to 90% might be a good number.
- If everything still looks good, go ahead and choose the next radio button: "Test all traffic". Remember to test your applications again at this stage.
- If everything is still looking good, you can continue to the next phase: applying the migration.
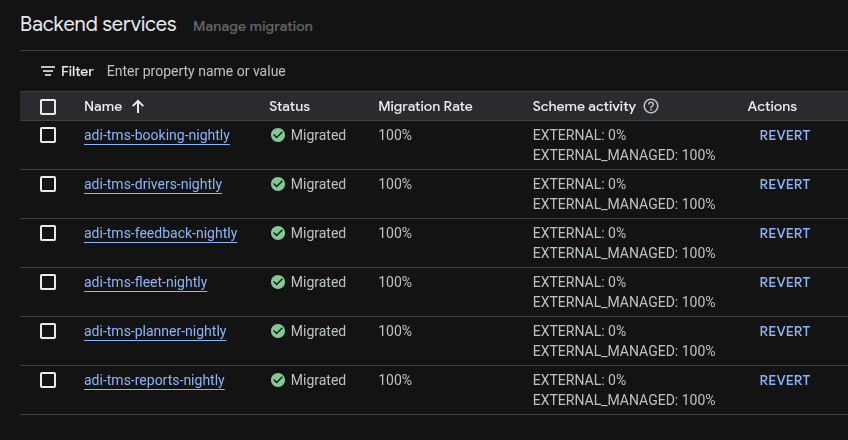
Phase 3: Apply the backend service migration
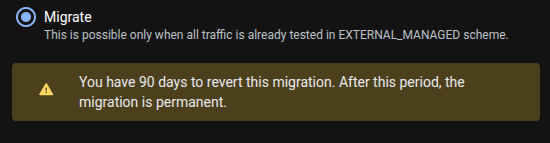 At this point, you are still able to revert the migration:
Phase 4: Migrating the load balancer forwarding rule
- Select your forwarding rule and click "Manage migration"
- Similarly to the backend services, go through the radio buttons while testing the applications at each step:
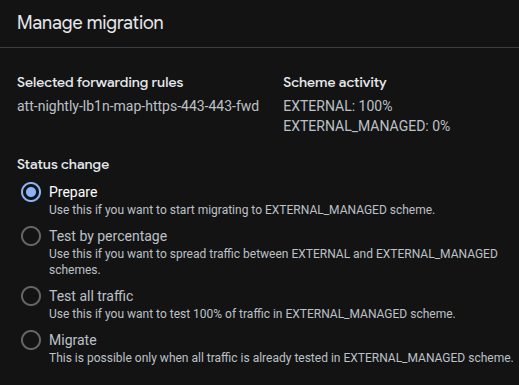
- When you have gotten past "Migrate" step, the load balancer transforms into a modern load balancer. Congrats!
Phase 5: Update Terraform configurations
todo: write about updating them.
Old, dangerous migration method
Google instructions: https://cloud.google.com/load-balancing/docs/https/migrate-from-classic-global
Compute instances, instance groups and health checks do not need any extra configuration.
- Create the HTTP and HTTPS Application Load Balancers
- If you need to re-use the IP address from the old load balancer, you can either destroy/re-create the classic load balancer to detach the IP address now or re-create the newly-created modern lb URL Maps and classic load balancer later.
- Re-create
EXTERNAL-type load balancing scheme backend services (applications) asEXTERNAL_MANAGED- If a backend service is not
EXTERNAL_MANAGED, you will get a generic error like so:Error creating GlobalForwardingRule: googleapi: Error 400: Invalid value for field 'resource.target': 'projects/attracs-devops/global/targetHttpsProxies/adi-devops-proxy-https-stable'. Load balancing scheme EXTERNAL_MANAGED does not match the url map load balancing scheme EXTERNAL., invalid
- If a backend service is not
- Attach the new backend services to the host rules and path matcher rules (routing rules in GUI) of the new load balancer (URL Map)
- Make the necessary DNS changes
- Remember that office network DNS is managed by Ahola IT
- Test that everything works
- If you found out that you need to use the IP address from the old load balancer, you can destroy the old load balancer and re-create the new load balancer (URL Map) using the recovered IP address.